") 15
15
Nov - 2020Cloud Platforms
5 min | 25566This tutorial is a follow-up of M5Stack: Fresh air checker helps you to stay safe from #COVID-19, in which I explained how to build a CO2 measuring device using M5Stacks and SG30 sensors. These sensors can help to prevent Covid-19 spread in a room. The collected measurements were sent to the Google Cloud Platform and a microservice offered them on a Website or a RestAPI using HTTP. This tutorial adds an
Nginxmicroservice to offer the Website and RestAPI over HTTPS.Let's start with some explanation about how HTTPS works: The encryption and security functionalities for HTTP are implemented through the Transport Layer Security (TLS) protocol. TLS defines a standard way to secure any network communication channel. The idea is that when a client (browser, application, etc.) establishes a connection with a server and requests an encrypted connection, the server responds with its SSL certificate. This certificate acts as an identification for the server (includes the name of the server and the domain) and is signed by a certificate authority (CA). If the client knows and trusts the CA, they can confirm that the certificate signature comes from the entity, and then they can be sure that the server is legitimate.
To be able to get an HTTPS connection to the microservice application, you need to have at least a hosting in which you can add subdomains and edit the DNS configuration (`A` record) of them. IPs cannot have an HTTPS certificate. You need a domain name.After verifying the certificate, the client creates an encryption key to use for communicating with the server. This key is sent securely to the server (encrypted with the public key included with the server's certificate). The server, which has the private key (that corresponds to the public key), can decrypt the packet and obtain the key. From this point on, all traffic is encrypted with the key that only the client and server know.
Therefore, we need two items:
- a server certificate, which includes a public key and is signed by a CA,
- and a private key that goes with the public key included in the certificate.
As you have already heard, there is the so called "self-signed" certificate in which the signature is generated using the private key that is associated with that same certificate. HTTP clients have a pre-configured list of known and trusted CAs, but obviously, if you use a self-signed certificate, this is not going to be known by the CA and validation will fail.
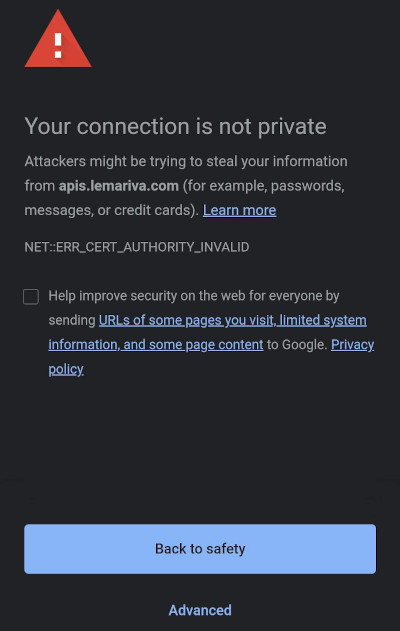
![VM f1-micro instance running]()
Fig. 1: Self-signed certificate.To request a certificate from a CA, the entity is going to verify that you are in control of your server and domain. This verification depends on the CA, and if the server passes the verification, then the CA will issue a certificate for the server with its signature that you can install. This certificate lasts for a year. However, most CAs charge money for these certificates. But, since recent years there are more and more CAs that offer them for free. The most popular free CA is Let's Encrypt, which offers an automated process to get a certificate.
![VM f1-micro instance running]()
Fig. 2: VM f1-micro instance running.These instructions are for every VM/Machine that has access to the Internet, is running Linux OS, and has a public domain name (
http://www[...]). However, I will focus on them to extend the microservice application that we started in the previous tutorial. So, to get the certificate, you need to install the open-source certbot tool on the VM instance in which the application is running:- Click on the SSH button from the f1-micro VM instance listed on the Google Compute Engine control panel (see Fig. 2)
- Type the following on the Terminal:
sudo apt-get install software-properties-common
sudo add-apt-repository ppa:certbot/certbot
sudo apt-get update
sudo apt-get install certbot
Certbot uses different ways to verify your site. But, the easiest method is
webroot. Certbot adds a static subdirectory (.well-known) on the root of your website (/) and then store some files in it. Then, the bot uses an HTTP client to retrieve those files under e.g.http://lemariva.com/.well-known/.... If the files are accessible, then certbot confirms that you are in full control of your server and the domain name and it generates the certificates. For Flask, which doesn't have a static file root directory, it is necessary to define that directory. Therefore, I will be using Nginx as a reverse proxy to do that. With Nginx, you can create a mapping that will give certbot a private directory where it can write the verification files. The HTTP server block in thenginx.conffile looks like this:server { listen 80; server_name apis.lemariva.com; location ^~ /.well-known { root /etc/nginx/ssl/bot; } location / { return 301 https://$host$request_uri; } } server { listen 443 ssl; server_name apis.lemariva.com; location / { proxy_pass http://upyco2-service:8080; proxy_set_header Host $host; } ssl_certificate /etc/nginx/ssl/fullchain.pem; ssl_certificate_key /etc/nginx/ssl/privkey.pem; }As you see, the server will respond to HTTP and HTTPS requests. If you point your browser to
http://apis.lemariva.com/.well-known, you will get the files inside/etc/nginx/ssl/bot. If you point tohttp://apis.lemariva.com/, you will be redirected tohttps://apis.lemariva.com/, which has a proxy pass tohttp://upyco2-service:8080(our sensor service) that is only accessible internally. What's important here is that/etc/nginx/ssl/botis a folder inside the container. Thus, you need to bind this folder to a HOST folder-vto be able to use the certbot. Therefore, the configuration of theNginxservice on thedocker-compose.ymlfile looks like this:nginx: image: nginx:1.19-alpine ports: - "80:80" - "443:443" volumes: - ./nginx/nginx.conf:/etc/nginx/nginx.conf - ./nginx/cache:/etc/nginx/cache - ./nginx/ssl:/etc/nginx/ssl - ./nginx/ssl/bot:/etc/nginx/ssl/botAs you see above, the internal folder is linked outside the container under volumes:
./nginx/ssl/bot:/etc/nginx/ssl/bot.Wait, wait! Before you start the microservice application that I provided, you need to make some modifications. To start it, you need to put a self-signed certificate and key in the folder
./nginx/ssl. These files will be replaced with the one generated by the certbot. But, the config has that section, and if you don't provide the files, the Nginx server will exit. Thus, go inside the./nginx/sslfolder and type:openssl req -newkey rsa:2048 -new -nodes -x509 -days 3650 -keyout privkey.pem -out fullchain.pemand answer the questions. Then, you can start the microservice application by typing:
docker-compose up -dYou need also to change the
server_namein thenginx.conffile.Then, to generate the "real" certificate and key type the following:
sudo certbot certonly --webroot -w [PATH]/nginx/ssl/bot -d [DOMAIN_NAME]replace
[PATH]with the absolute path to the folder, and[DOMAIN_NAME]with your domain name.If certbot can verify the domain, it will write the certificate file as
/etc/letsencrypt/live/[DOMAIN_NAME]/fullchain.pemand the private key as/etc/letsencrypt/live/[DOMAIN_NAME]/privkey.pem, and these are going to be valid for 90 days. You can copy these file inside the./nginx/sslfolder and restart the microservice application using:docker-compose restartCertbot can also be used to renew the certificates. To do that type the following on a Terminal:
sudo certbot renewIf there are any certificates in your system that are close to expiring, the above command renews them, leaving new certificates in the same locations. You will likely need to copy the files again. You can also write a
shfile and start acrontabtask to do this automatically.![RestAPI website]()
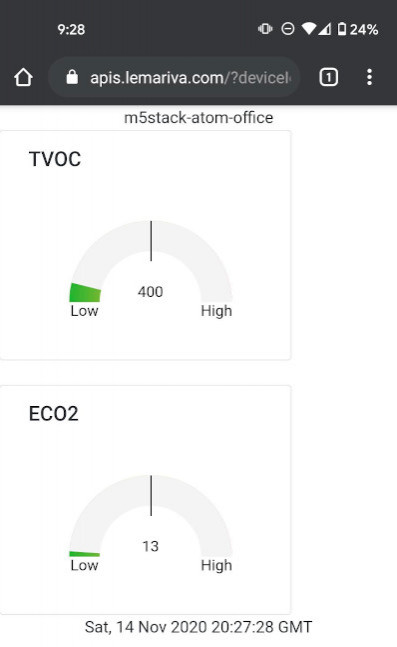
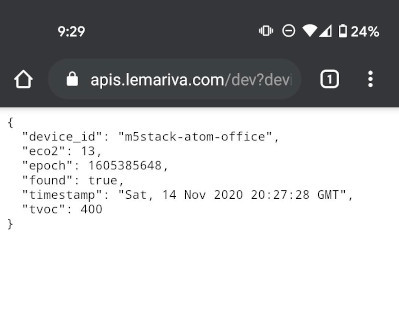
Fig. 3: Sensor website.![RestAPI sensor]()
Fig. 4: Sensor RestAPI.
We use cookies to improve our services. Read more about how we use cookies and how you can refuse them.
")

")


")
")

")
Empty