 18
18
Sep - 2018Product Reviews, Raspberry Pi
4 min | 4101#Review: RasPad - a tablet for open-source platforms like Raspberry Pi
Product Reviews, Raspberry Pi | 4 min | 4101
Table of contentShowThis is my first review on a product that I bought. I hope you enjoy it! Advices and tips are welcome. Please leave me them in the comment section.
Update: I changed the title of the article from "#Reviews: RasPad - an open source tablet for Raspberry Pi" to "#Reviews: RasPad - a tablet for open-source platforms like Raspberry Pi". The table is a close-source solution for open-source platforms like Raspberry Pi, Beaglebone, etc. (thanks Zykino for your advice!)
Introduction
At the beginning of March I supported the Kickstarter campaign called RasPad. I pledged for the
Super Early Bird - RasPadwhich includes:- Power Adapter
- RasPad Without Raspberry Pi
I didn't want the
RasPad Kitbecause I had a Raspberry Pi B+ that I wasn't using.The estimated delivery was May 2018, but as it usually happens with the Kickstarter campaign, it was delayed and arrived last week (12.09.2018).
![RasPad kit!]()
Fig. 1: RasPad The RasPad is a portable Raspberry Pi tablet and consists of:
- a plastic body (ca. 260 x 179 x 50 mm)
- an IPS LCD 10.1 inches display with a resolution of 1280 x 800 pixels (HDMI interface),
- a multitouch (10 points) sensor (USB connection),
- stereo 2 W speakers,
- a 6000 mAh 3.7 V Li-Po battery,
- brightness and volume control buttons,
- a power switch,
- LEDs for battery and power status,
and it was produced by SunFounder. SunFounder is a company focused on Science, Technology, Engineering and Mathematics (STEM) education with products like open source robots, aircraft models, and smart devices distributed globally.
Here you have an unboxing video:
Touch Screen
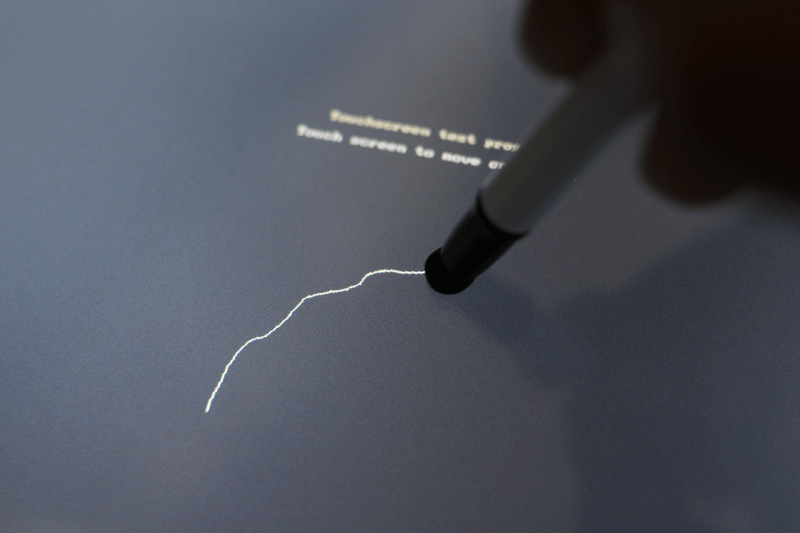
The first thing that I had to do as I received the board, was to calibrate the touch screen. You need to upgrade the display driver over the USB cable. It's not an internal correction on the Raspberry Pi. Sunfounder has the following article in the Wiki. Basically you need Windows, then you download a
zipfile with anexefile which uploads ahexfile. Read thePDFfile in thezipfile. It is a nice step by step guide. In Fig. 1 you can see the results of drawing with a pen. After the calibration, the touch screen is very accurate.![Drawing on the calibrated Touch Screen]()
Fig. 2: Drawing on the touch screen. Resolution
The resolution 1280 x 800 pixels in a 10.1 inches' display is fairly enough to use as a low cost tablet. The pixel density results 149.45 PPI with a dot pitch of 0.17 mm. If I compare the RasPad with the official Raspberry Pi display that I have, the pixel density is higher (official display: 133.28 PPI, 7 inches and 800 x 480 pixels), and you can see the difference. The reaction time and the touch sensitivity is very good. Fig. 3 shows you two photos taken directly to the display. The resolution isn’t on the level of a Retina display, but the pixel density is still pretty high.
The RasPad has an external HDMI port. You can use the RasPad as monitor e.g. for your PC. It's not an output, it is an input HDMI.
![Display 100 Brightness]()
![Display Resolution]()
Fig. 3a: Display Resolution Fig. 3b: Display Resolution with Angle Brightness
You can set the brightness of the display using the external buttons. That is a really nice feature! The official Raspberry Pi display does not have that possibility. I made 3 photos with same camera and light settings and 3 brightness levels of the display (see Figs. 4)
![Display 100 Brightness]()
![Display 100 Brightness]()
![Display 100 Brightness]()
Fig. 4a: Display 100 brightness Fig. 4b: Display 50 brightness Fig. 4c: Display 0 brightness With the 100 brightness setting, you see some vertical lines on the display (led arrays?). With the 0 brightness you lose picture details. A setting between 50 and 75 is optimal.
Update: Note that only the brightness but not the back-light can be changed and this could be a problem when you have a low luminosity apartment. (thanks Zykino for your advice!).
Battery and Consume test
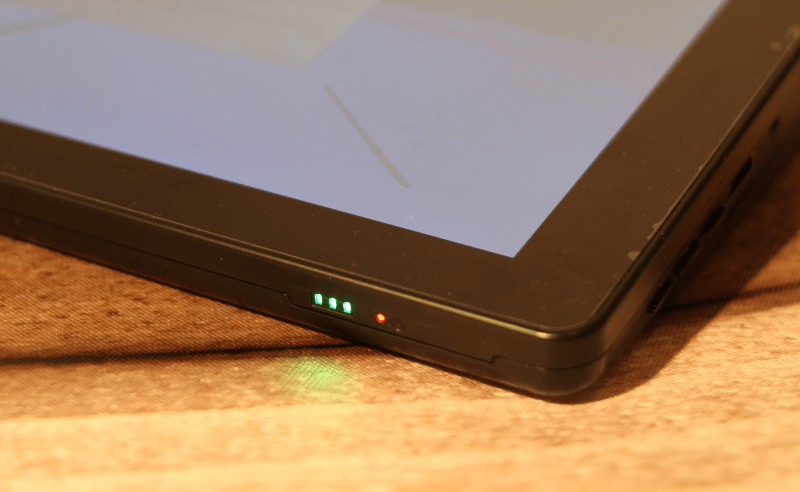
The number of external lighted green LEDs indicates the percentage of battery life. There are 3 green LEDs, which means, 33% 66% or 100% of battery. There is also a red LED that indicates that the RasPad is ON (see Fig. 5). If you press the power button shortly, you can switch on/off the display, and the Raspberry Pi remains on. That's a nice feature. If you want to switch on/off the Raspberry Pi, you need to press and hold the power on/off switch for about 3 seconds. The battery status is not reported to the Raspberry Pi :'( and if you shutdown the Raspberry Pi, the display remains on, you need to turn it off holding the power on/off switch for about 3 seconds :'(.
![Battery LEDs]()
Fig. 5: Battery and Power LEDs Power Consume Watt (W) Charging battery 11.7 (beginning) - 8.4 (ending) Charging battery & Raspberry Pi 3 B+ On & Display Off 10.4 Charging battery & Raspberry Pi 3 B+ On & Display 100% 15.5 Charging battery & Raspberry Pi 3 B+ On & Display 0% 15.5 Table 1: Power Consume RasPad There are no differences in consume between brightness 0 and 100. That was weird!
To test the battery's life, I let YouTube (on Chromium) play videos (about 15-20% performance) with the brightness and volume at 50%, Bluetooth off and Wi-Fi on, but not connected (I used Ethernet) and I only got a little over 140 minutes of runtime. After 80 minutes, it started to beep every 5/10 minutes. That's annoying, considering that the battery lasted 60 minutes more.
Switches
After two month of use, the power on/off switch is not working anymore. I opened the device and found that the switch is broken. I wrote an e-mail to Sunfounder to get the part number, but I am still waiting for the answer. The switches should be changed in the next product release. They are too weak!
Update: Sunfounder answered my email. They have sent me three new switches.
Conclusion
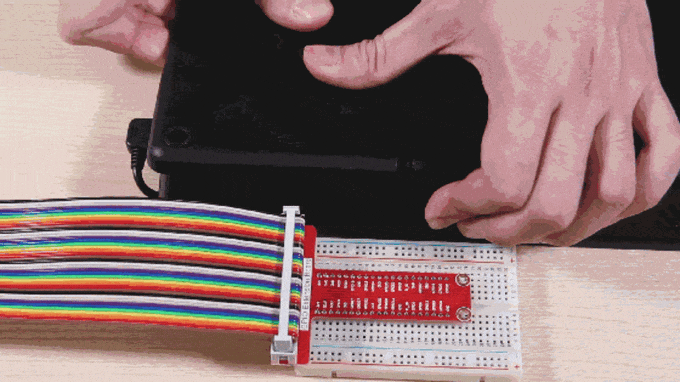
The RasPad really is not a competitor to the iPads and Android tablets of the world—and that’s a good thing. It’s designed with makers in mind, and it does a pretty good job of achieving that goal. The pixel density is still pretty high, the touch screen is sensitive enough. You can install different operating system (Raspbian, Ubuntu Mate, Chromium OS, Android), and use different compatible Raspberry Pi boards (Asus-Tinker, Banana Pi, LattePanda, Beaglebone etc.). It is really easy to connect external sensors and actuators, and you can use Scatch with your Kids. The 40-pins, DSI and CSI connectors are free. SunFounder doesn't need to create a community around the RasPad, they use the Raspberry Pi community.
The actual price should be near USD230 without Raspberry Pi. I found only a link to buy it now: here.You can find the Raspad for $185.99 without Raspberry Pi here:The price is a little bit expensive. But if you look to buy a 10.1 inches' display, a battery, speakers and a body to connect all these things together, you are going to be near that price.
Update: The RasPad is avaiable here and is 20% because of XMas -USD208 (original price is USD259)-If you have further questions, please let me know in the comment section. As I said, advices and tips are welcome.
![40-Pins connector]()
Fig. 6: 40-pins connector
We use cookies to improve our services. Read more about how we use cookies and how you can refuse them.


")

")


")
Empty