- 24
Dec - 2019M5Stack, MicroPython
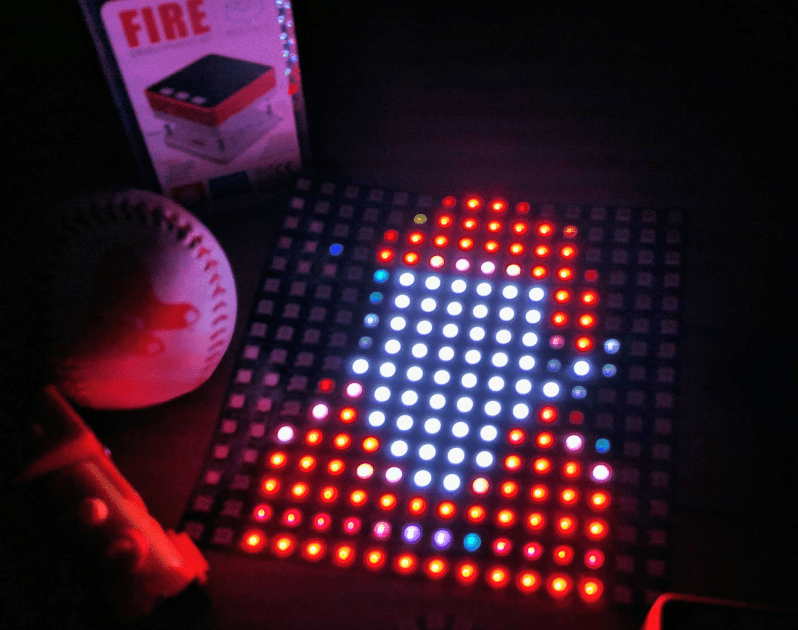
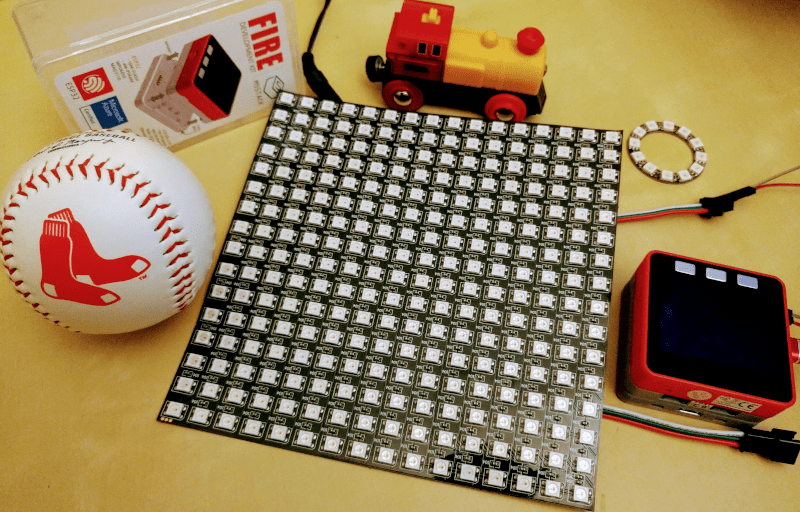
4 min | 4197Holiday season has begun and Christmas and the New Year 2020 are approaching! This means, time to reflect and to clean up code and, therefore, I am updating some of the GitHub's projects to summarize the year. I started with the Christmas lights project! But, this time, I took the M5Stack Fire and a new LED panel (WS2812b - 16x16 pixel) and with the XMasLight project, these are the results (Fig. 1 & 2):
![xmas_2020-min (1).png]()
Fig. 1: M5Stack and a new WS2812b Panel (16x16 pixel). Hardware and Software
The following hardware and software is used in this tutorial:
Note (*): You need the M5Stack Fire! There are cheaper versions (for example, Basic, Gray, M5Stick), but the RAM is only 512 KB on those models, and therefore will not work well with MicroPython. The following figure shows a summary of the differences between the models:![M5Stack]()
Flash MicroPython
As I mentioned before, you need the M5Stack Fire due to the psRAM (extra 4MB of RAM). Otherwise, you only have 512KB RAM for the MicroPython stack and your code, which means less than 100KB of free memory and you'll get the
MemoryError: memory allocation failed, allocating xxxx bytes.error (check this link for some extra tips).To flash MicroPython on the M5Stack Fire, you need first to clone the M5Stack MicroPython repository. This MicroPython version was extended for the M5Stack and, therefore, has the libraries to control the LCD, LED, speaker etc. In addition, it also works with the BASIC and the FIRE version of the M5Stack. Therefore, it needs to be configured to get the additional 4MB of psRAM.
To build the MicroPython firmware for ESP32 with support for psRAM, type the following into a Linux terminal:
git clone https://github.com/m5stack/M5Stack_MicroPython
cd M5Stack_MicroPython/MicroPython_BUILD
./BUILD.sh menuconfig
In the
menuconfigselect:→ Component config → ESP32-specific → Support for external, SPI-connected RAMand it is recommended to select also this option too:
→ Component config → ESP32-specific → SPI RAM config → Make RAM allocatable using heap_caps_malloc(other options should also work, but I tried this without any problem).
Then,
exitthe menu and type:./BUILD.sh ./BUILD.sh flashThe last command compiles the firmware and flashes the M5Stack, so the device must be connected to the USB port and you should see it by typing:
ls /dev/ttyUSB0 /dev/ttyUSB0Them5stack/M5Stack_MicroPythonrepository is a fork fromloboris/MicroPython_ESP32_psRAM_LoBoand includes specific libraries for the M5Stack (lcd, buttons, speaker etc.). If you want to save some flash memory, you can flash this firmware. The config and build commands are the same for M5Stack repository.After flashing the MicroPython firmware to the M5Stack, you can connect to the board using VSCode and the PyMakr extension. If you need some help configuring this, read the following articles:
- MicroPython: Visual Studio Code as IDE
- MicroPython: VSCode IntelliSense, Autocompletion & Linting capabilities
The second article is optional, but you get IntelliSense, Autocompletion & Linting capabilities for MicroPython.
![xmas_2020_new-min.png]()
Fig. 2: M5Stack and a new WS2812b Panel (16x16 pixel). XMas-Lights - WS2812B Panel
To make the panel work, follow these steps:
Download the repo from GitHub
git clone --recursive https://github.com/lemariva/Xmas-lights.gitYou need the recursive option, because the WS2812b driver is in another repository.
Configure your mappings. The folder mapping contains two files that creates the mapping of letters or icons to the 16x16 LED panel:
letter2matrix.py: reads the defined font file (font_file) and generates acharacters.txtfile that contains the mapping (ascii uppercase, numbers and punctuation characters are converted).icons2matrix.py: reads all*.pngfiles from the folderimgand generates aicons.txtfile that contains the mapping of the icons.
Copy the contents of these files (
characters.txtandicons.txt) to thechars.pyandicons.pyfiles, respectively. As you see, you must define a variable at the beginning of those files (the mapping is stored in python dictionaries). Some extra info:- Only capital case letters are mapped, that is, you must write your message in uppercase.
- The name of the
pngfiles is used to map the icons. Therefore, the name should only contain[a-z]characters. If not, rename the file!
These functions are similar to those described in this tutorial, but the panel wire connections are different and some LED rows must be flipped.
Configure your WiFi credentials on boot.py, if you want the M5Stack to connect to your router. This can be skipped, but then delete the lines.
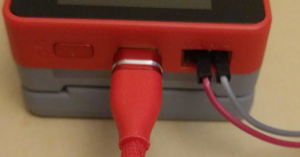
Connect the GND (white wire) and DIN (green wire) to GND and G21 of the M5Stack. You find these pins on the port near the USB-C connection (see Fig. 3).
Connect the panel to a 5V power supply and the M5Stack to your PC.
Upload the code using VSCode and the PyMakr plugin.
Enjoy! The LEDs are really hell, you might need sunglasses! ;)
![xmas_m5stack.png]()
Fig. 3: M5Stack connection to the LED Panel (Grey-GND / Red-DIN). Conclusions
This tutorial helps you compile the MicroPython firmware with psRAM support for the M5Stack Fire. Then, you can use the device to control a WS2812b panel (16x16) to write messages or display icons. Mapping functions are included to map characters, numbers and icons to the panel. Some examples are included in the repository. XMas is almost here, then enjoy some lights! Stay tuned to the blog, a XMas video is coming!
We use cookies to improve our services. Read more about how we use cookies and how you can refuse them.


Empty