") 26
26
Feb - 2020PCB/Board designs, Product Reviews
4 min | 18977Table of contentShowLast month, I published a review of the DSO138. This time, I put together the WAVE2 (15801K) and I review it in this article. The WAVE2 is a 2-channel portable oscilloscope design by JYETech for a hobbyist. It has a resistive touch screen display, X-T (signal-time) / X-Y (signal-signal) plotting functionalities, memory (4 blocks), measurement functionalities (V -max, min, avr, pp, rms-, frequency, duty cycle), serial interface and can be powered using an external 5V source (micro USB connector) or an internal 3.7V Li-ion battery. Furthermore, it has a built-in function generator. The kit also includes two BNC probes with x10 attenuation (nice quality) and a pencil for the touch display.
![unassembled_kit.jpg]()
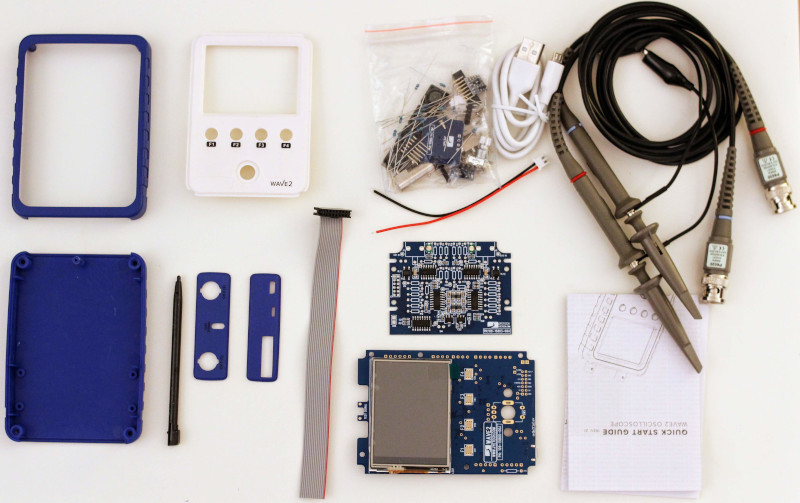
Fig. 1: WAVE2 - Unassembled Kit Unlike the DSO138, JYETech sells two versions of the WAVE2: An unassembled kit without a battery and the assembled unit with a battery. I got the unassembled kit without battery. Thus, I needed to solder some components: resistors (1/8 W), BNC connectors, pin headers, and the rotary encoder. But the good news is that the SMD components are already soldered!
Hardware
As I mentioned, the WAVE2 oscilloscope is available in two versions: an unassembled kit without battery (15801K), or an assembled unit with Li-on battery (15801). If you buy the unassembled kit, you can add the battery later because the charging regulator is included.
WAVE2 Review
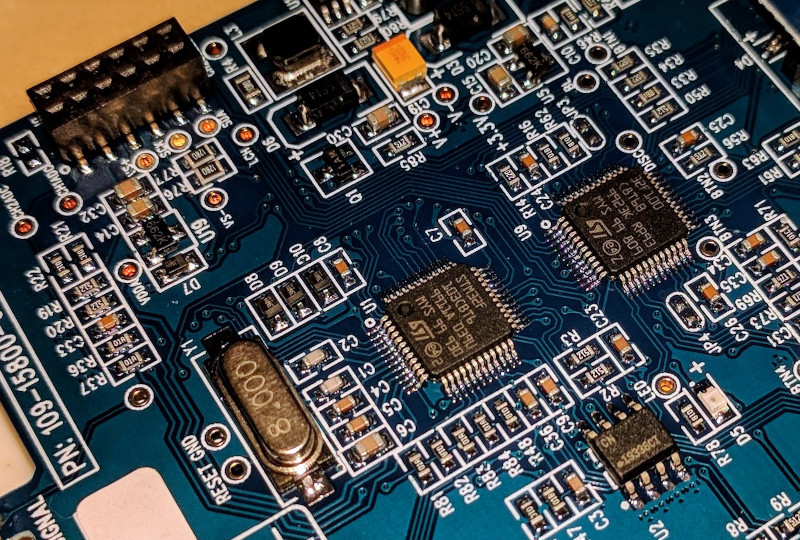
In Fig. 1, you can see all the components that you get if you buy the unassembled kit. It took me about an hour to solder all the pieces and use the oscilloscope. On the main board -where both ST are located (see Fig. 2)-, you need to solder pin headers, two optional break-out boards (battery charging regulator (BOB1) and power switchboard (BOB2), and the rotary encoder; and on the analog board, you've to solder resistors, BNC connectors and also pin headers. These two boards (main and analog) are then connected through a pin header (left upper corner Fig. 2).
![wave_st_micros.jpg]()
Fig. 2: WAVE2 - Main Board Like the DSO138, the WAVE2 has an RGB display with a resolution of 320x240 (QVGA) and a screen diagonal of 2.4" (6.1 cm), in which you see the input signals (2 channels), some options, and the typical oscilloscope grid. However, in this case, it is a resistive touch screen. Then, you can use your fingers (also wearing gloves) or a pencil (one pencil comes with the kit) to select the options (the value is highlighted with red) and to change the values you can use the rotary encoder.
You can change the following settings:
- the scale of the input signals (5mV/div - 20V/div), the coupling (DC/AC) and the offset. Furthermore, you can also deactivate a channel (scrolling the scale, the OFF option appears after the 20V/div selection).
- the timebase (10us - 500s)
- the trigger mode (auto, normal or single), type (rising/falling edge), level and source (CH1/CH2).
![IMG_20200223_011425.jpg]()
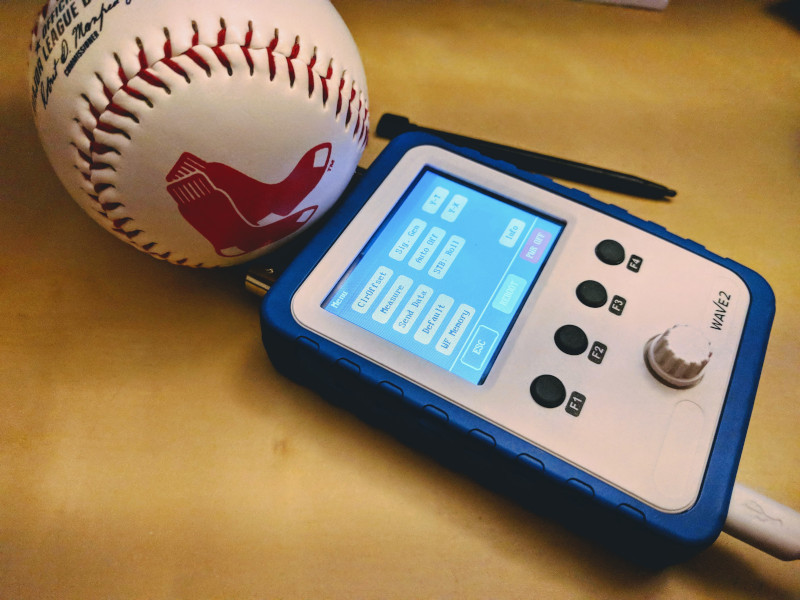
Fig. 3: WAVE2 - Main Menu If you push the rotary encoder, you'll get a menu with these options (see Fig. 3):
ClrOffset: align vertical position (offsets) to 0VMeasure: switch to a measurement selection menu, in which you can activate the following options:Vmax/Vmin/Vavr/Vpp/Vrms: maximum / minimum / average / peak-to-peak / root-mean-squared voltage of signal;Freq: most prominent frequency of a signal;Cycl: most prominent wavelength of a signal;Duty: most prominent duty cycle of a signal;10x: auto-correct signal when the 10x attenuation factor of the probe is used.
Send Data: send captured data via serial port (you need the extra Uart-USB) board to get the dataDefault: restore factory default settings;WF Memory: enter the memory menu, in which you can select one of the 4 memory blocks (1024 points each) to save the waveform or load the waveform from the selected memory.Sig. Gen: enter the signal generator mode, in which you can define the signal's (2x) type (sine, square, sawtooth, stair), frequency (max. 20kHz), voltage (max. 3V), offset (max. 3.3V), and phase.Auto-Off: enter the auto power-off menu with the options to enable or disable the power-off option. You need to solder the BOB2 break-out board and remove theR50resistor from the mainboard;Y-T/Y-X: enter Y-T or Y-X plotting mode;Info: display the firmware information, supply voltage, and a QR code with a link to the user manual.
More info is available here.
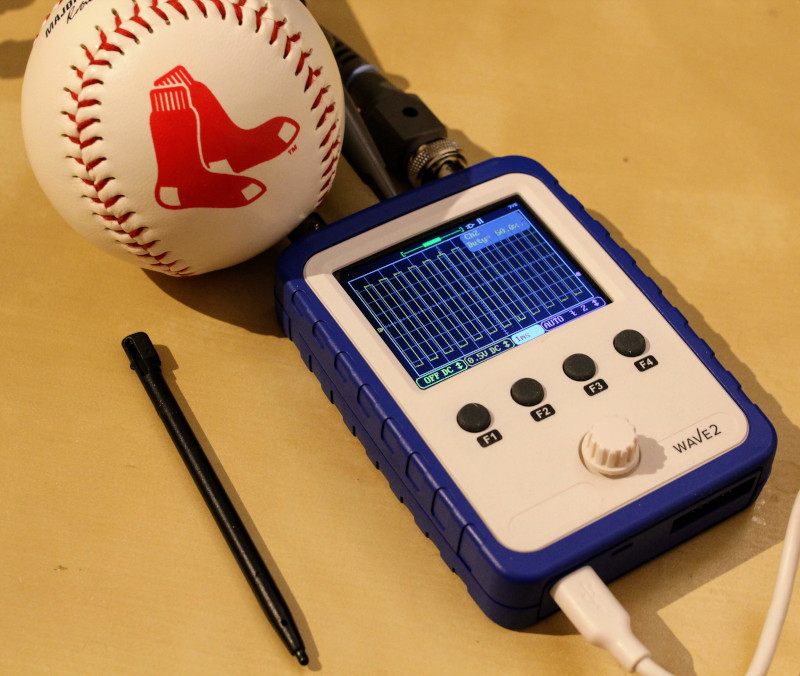
The WAVE2 has an analog bandwidth of 200KHz (DC), and a maximum input voltage of 50Vpk. Furthermore, it has a resolution of 12-bits, which is defined by ST-microcontroller's ADCs.![assembled_kit.jpg]()
Fig. 4: WAVE2 - Mounted Kit Conclusions
If you're thinking about buying an affordable oscilloscope that works well, the WAVE2 is an excellent choice for you. It only costs under 65€ and comes with two nice BNC probes (with attenuation). The resistive touch screen could be a bit small, but oscilloscopes are thought to see waveforms and not to perform precise measurements. Furthermore, it offers some basic measurement functions that can help you read the waveform faster (frequency, duty cycle, vmax, vmin, etc). The memory blocks and the possibility to send the saved waveforms via serial interface are great to have. The maximal input frequency and voltage are more than OK for hobby-projects and the signal generator is an excellent feature too. To sum up, the WAVE2 is "a nice to have" oscilloscope and unlike the DSO138, "you get more than what you pay for": you get a lot of electronics for little money that works well.
We use cookies to improve our services. Read more about how we use cookies and how you can refuse them.
")


")


")
Empty