- 04
May - 2022Product Reviews, Raspberry Pi
4 min | 11206Last December, I wrote an article about the crowdfunded "High Resolution Autofocus Camera Module" for Raspberry Pi from Arducam. That camera costs only USD25 and has autofocus and a resolution of 16 MP. You can read more about it here: Raspberry Pi: ArduCAM powerful $25 camera with high resolution and autofocus.
Last week, I got a sample of the new Arducam Hawk-eye camera. The camera module also has autofocus but the resolution has been improved to 64MP and it’s available from the Arducam store at a pre-order discount (
$59.99$35.99 as I'm writing this article). Let's start with the review of this new camera module!Driver Installation
The official drivers for the Raspberry Pi camera modules (V1/V2/HQ) are already built-in in Raspberry Pi OS. For the Arducam 16MP, and now for the 64MP Hawk-eye camera, you need to install the drivers by yourself. The good news is that Arducam provides a bash file that does everything for you. Just open a Terminal on your Raspberry Pi and type the following:
wget https://github.com/ArduCAM/Arducam-Pivariety-V4L2-Driver/releases/download/install_script/install_pivariety_pkgs.sh

chmod +x install_pivariety_pkgs.sh

./install_pivariety_pkgs.sh -p 64mp_pi_hawk_eye_kernel_driver

./install_pivariety_pkgs.sh -p libcamera_dev

./install_pivariety_pkgs.sh -p libcamera_apps
After installing the drivers, open the file
/boot/config.txt, and under[pi4], add the following line:dtoverlay=vc4-kms-v3d,cma-512Otherwise you will get the following error while taking a photo:
ERROR V4L2 v4l2_videodevice.cpp:1179 /dev/video0[13:cap]: Unable to request 1 buffers: Cannot allocate memoryNote 1: If you install this driver and you want to use an official Raspberry Pi camera, it's not going to work. You need to reverse the drivers to the original ones. A clean installation of Raspberry Pi OS may be needed.
Note 2: Check out the repository Arducam-Pivariety-V4L2-Driver. You can find there Python examples that you can use in your project.Comparing The Specs
In the following table, you can find the comparison between the Raspberry Pi cameras:
ArduCAM 64MP ArduCAM 16MP Camera Module V2 HQ Camera Net Price $59.99$35.99$25 $25 $50 (without lens) Sensor Sony (*) Sony IMX219 Sony IMX477 Optical Size Type 1/1.7" Type 1/2.53" Type 1/4" Type 1/2.3" Sensor Resolution 9152×6944 pixels 4656×3496 pixels 3280 × 2464 pixels 4056 x 3040 pixels Still Resolution 64 Megapixels (on 4B/CM4) 16 Megapixels 8 Megapixels 12.3 Megapixels Camera Case Yes Yes No No Focus Auto / Manual Auto / Manual Fixed Manual Video Modes on Raspberry Pi 1080p30, 720p60 and 640×480p60/90/120 1080p30, 720p60 and 640×480p60/90/120 1080p30, 720p60 and 640×480p60/90 1080p30, 720p60 and 640×480p60/90 Video Modes on Camera Module 1280x720@120fps, 1920x1080@60fps, 2312x1736@30fps, 3840x2160@20fps, 4624x3472@10fps, 9152x6944@2.7fps N/A N/A N/A Linux integration V4L2 driver available V4L2 driver available official supported official supported Focal ratio (F-Stop) 1.8 1.75 2.0 Depends on lens Focal length 5.1 mm 4.28 mm 3.04 mm Depends on lens (*): I asked for the specific sensor, but the marketing team is not allowed to disclose any sensor info of this module besides the manufacturer.
Note 3:: A Raspberry Pi 4 or Compute Module 4/4S is required for 64MP resolution, the previous generation Raspberry Pi (2/3/Zero W/Zero 2 W) boards can still be used with the camera but only up to 16 MP.Camera in Action
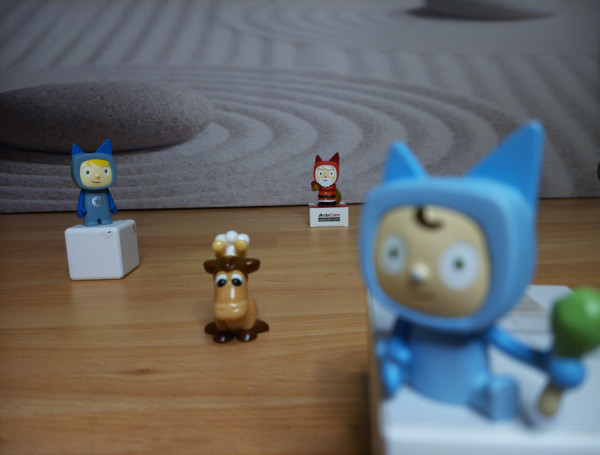
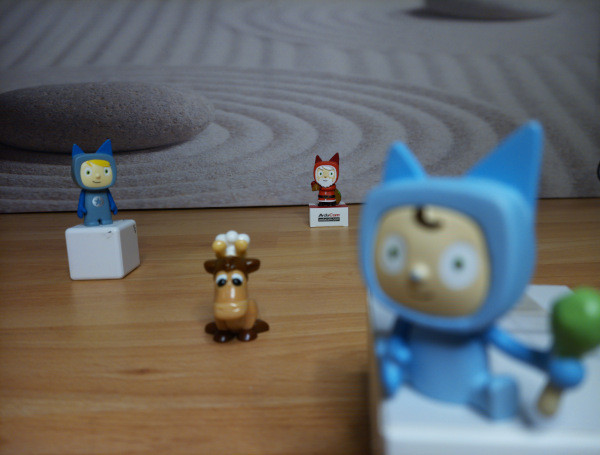
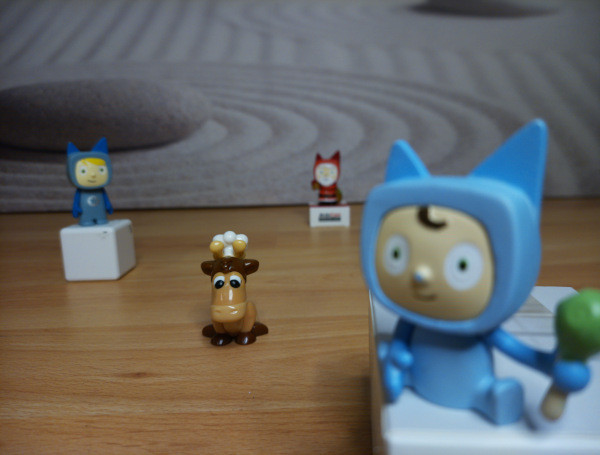
I took some photos, so that you can evaluate the quality by yourself. I also added two videos in which you can see the focus and the zoom functionalities working.
Video 1: Changing the Focus between Tonies.
Video 2: Zooming and focusing.FYI: Toniebox is a child-friendly audio system that allows kids to listen to music and stories using their own portable speaker called a Toniebox which is operated using colorful figures called Tonies.Additional information can be found on the camera page, where you’ll also find other image samples taken with this camera.
Conclusions
ArduCAM has developed a new camera module for the Raspberry Pi in less than 3 months since the last Kickstarter campaign. The resolution is 4x greater than the latest offered model. The module also has autofocus and the driver allows you to use digital zoom which makes it easier for you to focus on objects as you can see on Video 2.
This camera is a great first option if you need to buy a camera for the Raspberry Pi and you don't want to go through different lenses and eventually other problems. The driver installation was straightforward and the examples in the repository help you to integrate the camera into your Python project! As I mentioned in the article for the ArduCAM 16MP, I can only identify following downsides of the ArduCAM, but they are application-related.
The advantages of a full autofocus functionality come with these downsides:
- An integrated lens that is not swappable. The Raspberry Pi HQ Camera Module offers, by contrast interchangeable lenses, making it possible to adapt the device for everything from ultra-wide-angle and macro to telephoto projects.
- Fixed-Focus is best for handling high vibrations. Autofocus uses an electromagnet to move a magnet that is mounted to a free-moving lens. So in high-vibrations, the vibrations are stronger than the electromagnetic force - and the lens vibrates all over the place - causing blurry/weird/"jello" images/video. Examples of high-vibration installations include mounted to a: Drone, Lawn Mower, Harley Davidson motorcycles, etc.
If you are also interested in other products. ArduCAM also offers a 64MP Quad-Camera Kit with an Arducam UC-512 expansion board and four 64MP Pi Hawk-eye camera modules that allows you to take four high-resolution photos from a single Raspberry Pi 4 at almost the same time. Other accessories are a pan-tilt kit, a camera & cable extension kit using RJ45 ports and Cat-5 cable to extend the range of the camera, and a CSI-to-HDMI adapter set. All those can be bought from the official ArduCAM store.
You should consider that just like everybody else, ArduCAM is affected by chip shortages too. They will do their best to ensure that you get your product without delays, but we are in difficult times right now, so be patient!
We use cookies to improve our services. Read more about how we use cookies and how you can refuse them.


Empty