 08
08
Jan - 2022MicroPython
5 min | 39903Table of contentShowLast week, I got some time to update the
lemariva/micropython-camera-driverto the actual versions of MicroPython, ESP-IDF, and the camera driver for the OV2640. MicroPython has changed since version 1.14 frommaketoCMakewhich makes it easier to add support for different modules: in this case for the OV2640.I will sum up the steps to compile MicroPython from Scratch, I've already written a tutorial for that:
but since a lot has changed, I've re-written it.
Flash MicroPython
To flash MicroPython, you need to install the
esptool. This can be made by typing the following on a Terminal.pip3 install esptoolThis required to have installed
python3andpython3-pipon Linux. On Windows, by installing Python3 you need to set the pip tool option.After installing the tool, you can go to the MicroPython firmware section and download the last version compatible with your board.
The page corresponding to your board includes the intructions to install MicroPython. For example, for an ESP32-based board, you need to type the following on a terminal:
esptool.py --chip esp32 --port /dev/ttyUSB0 erase_flashAfter erasing the flash, you write the MicroPython fimware starting at address 0x1000 by typing:
esptool.py --chip esp32 --port /dev/ttyUSB0 --baud 460800 write_flash -z 0x1000 esp32-20210902-v1.17.binThat's all you need. To connect to the board, you can use the VSCode IDE described below.
To get MicroPython running on ESP-based boards is really quite easy, right? However, if you want to add support to cameras, or other devices adding aCmodule to your firmware, you need to compile MicroPython from scratch or get a pre-compiled firmware.
To do that, check out the section "MicroPython from Scratch using Linux for ESP32-based boards" below.IDE for MicroPython and Intellisense
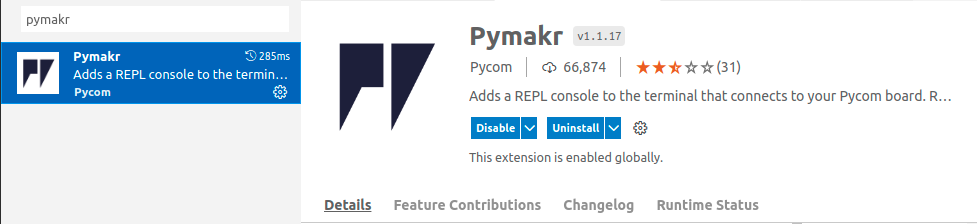
To program MicroPython and upload the code to the boards running MicroPython, I use Visual Studio Code (VSCode) and the Pymakr extension.
The open-source VSCode is a code editor redefined and optimized for building and debugging applications. It is compatible with Windows, Linux and Mac OS X.
![Visual Studio Code - Pymakr extension]()
Fig. 1: Visual Studio Code - Pymakr extension To use VSCode for MicroPython, you need to install the Pymakr extension (see Fig. 1).
This extension enables VSCode to communicate to a board running MicroPython using the build-in command line REPL. Thus, you can run a single file on your board, sync your entire project or directly type and execute commands using the terminal on VSCode.
However, you'll miss some of the main features of VSCode, namely intellisense, autocompletion, and linting capabilities. You can combine this extension with themicropy-cliPython module to get those features. You can find more information in this tutorial.MicroPython from Scratch using Linux for ESP32-based boards
To build MicroPython from scratch, you need to install a toolchain first and the ESP32 framework. ESP32 uses the "Espressif IoT Development Framework (ESP-IDF)" and the toolchain xtensa-esp32-elf. You get those from Github by typing:
mkdir ~/esp
cd ~/esp

git clone https://github.com/espressif/esp-idf.git
cd esp-idf
git checkout b64925c5673206100eaf4337d064d0fe3507eaec
git submodule update --init --recursive
./install.sh
The
./install.shcommand downloads the toolchain.Note 1: take the hash that I wrote above! If you use a newer commit you'll get the following aGuru Meditation Error: Core 1 panic'ed (LoadProhibited)error. Check this issue for more information.
Note 2: for the next steps, I assumed that you clone the framework inside$HOME/esp/and MicroPython inside$HOME/Documents/MicroPython. If you didn't do that, you need to update some paths below.After doing those steps, download MicroPython and its dependencies using:
cd ~/Documents
git clone https://github.com/micropython/micropython
cd micropython
git checkout [COMMIT_HAST]
git submodule update --init --recursive
The
git checkout [COMMIT_HAST]can be ignored if you want the latest version. Otherwise, you need to define the branch or[COMMIT_HAST]that you want to clone.Before starting to compile MicroPython, you need to add to the
$PATHenvironmental variable the toolchain and framework paths. Thankfully, the framework does that for us by typing:. $HOME/esp/esp-idf/export.shThen build the MicroPython cross compiler:
cd $HOME/Documents
cd micropython/mpy-cross
make
and go to the MicroPython port folder for the ESP32:
cd micropython/ports/esp32and build MicroPython:
make BOARD=[ESPECIFIC_BOARD]Note: I got some errors while compiling related to the
berkeley(DBTree) library:micropython/lib/berkeley-db-1.xx/PORT/include/db.h:1:1: error: expected identifier or '(' before '.' token ../../include/db.hTo solve those errors, I edited following files inside the folder
micropython/lib/berkeley-db-1.xx/PORT/include:bsd-queue.h:queue.h > #include "queue.h"db.h:../../include/db.h > #include "../../include/db.h"filevtable.h:../../include/filevtable.h -> #include "../../include/filevtable.h"mpool.h:../../include/mpool.h -> #include "../../include/mpool.h"
MicroPython 'pip install'
To install new packages on your ESP32 board, you need first to connect it to the Internet. You can do that using the network module and by running the following:
import network

ssid_ = [ROUTER_SSID]
wp2_pass = [ROUTER_WPA2_PASSWORD]

sta_if = network.WLAN(network.STA_IF)
sta_if.active(True)
sta_if.connect(ssid_, wp2_pass)

while not sta_if.isconnected():
    pass

print('network config:', sta_if.ifconfig())
Then, to install a package, simple type the following, the result is shown on Fig. 1.
import upip upip.install('notes-pico')![upip install notes-pico]()
Fig. 2: Installing notes-picousing the package managerupip.A lot of packages listed on
pypiare dummy packages (versioned with0.0.0). That means, they are empty. Installing packages on the ESP8266 is a challenge because of the limited RAM. You usually get amemory allocationerror.MicroPython with Camera Support (OV2640)
The following steps are needed if you want to add camera support to MicroPython.
- Add to the ESP-IDF components the driver camera:
cd cd ~/esp/esp-idf/components git clone https://github.com/espressif/esp32-camera.git cd esp32-camera git checkout 093688e0b3521ac982bc3d38bbf92059d97e3613 - After cloning the drivers, clone the MicroPython module for the camera:
cd $HOME/Documents git clone https://github.com/lemariva/micropython-camera-driver.git - Copy the files and folders inside the
boardsfolder intomicropython/ports/esp32/boards. Or use a symbolic linkln -s [...]/micropython-camera-driver/boards/ESP32_CAM [...]/micropython/ports/esp32/boards/ESP32_CAM(recommended - change the[...]to the right path). - Compile the firmware by typing following commands:
cd micropython/ports/esp32
make USER_C_MODULES=../../../../micropython-camera-driver/src/micropython.cmake BOARD=ESP32_CAM all
Note that the folder
micropython-camera-drivershould be in the same folder level as themicropython. Otherwise, you'll need to change the path (../../../../micropython-camera-driver/src/) to themicropython.cmakefile. - Deploy the firmware into the ESP32 by typing:
cd micropython/ports/esp32
esptool.py --port /dev/ttyUSB0 erase_flash
esptool.py --chip esp32 --port /dev/ttyUSB0 write_flash -z 0x1000 build-ESP32_CAM/firmware.bin
Note 1: To flash the ESP-CAM board shortcuts theGNDand theGPIO00pins. After flashing the board, remove the shortcut and reset the board.
Note 2: If you have a serial console or plugin connected to the board, you need to detach the connection. Otherwise, you won't be able to flash the firmware using the esptool.
Note 3: The serial port /dev/ttyUSB0 could change. You can list the devices using `ls /dev/ttyUSB*` to see, which USB port number is active.
Examples
The MicroPython example codes are included here:
Conclusions
This article is a needed update from my last tutorial for MicroPython. I try to keep it compact to reduce redundancy between the posts. You can check them, they usually have a troubleshooting area. Check also the issue area, maybe your question or problem has been already answered and solved. I invite you anyway to extend the driver for more cameras and options and send me a PR with your code so that I can merge it. :)
We use cookies to improve our services. Read more about how we use cookies and how you can refuse them.


")


")
Empty