 15
15
Feb - 2021LoRa/LoRaWAN, MicroPython, Raspberry Pi
5 min | 44281#Raspberry Pi Pico: The RP2040 meets LoRaWAN
LoRa/LoRaWAN, MicroPython, Raspberry Pi | 5 min | 44281
Table of contentShowThe "Pico" board with the RP2040 chip developed by the Raspberry Pi Foundation is the latest tiny fast and versatile board in Arduino Nano format. As you may already know, the board can be programmed using MicroPython and C/C++. In this tutorial, I extended the official MicroPython version to support cryptographic primitives, and this unlocks the possibility to connect the board (using the SX1276 chip) to the "The Things Networks" (TTN) - which means LoRaWAN support.
![]()
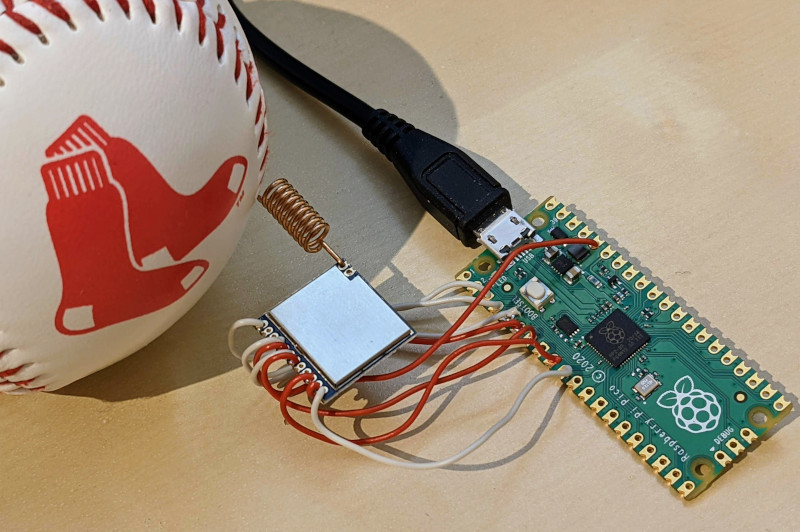
Fig. 1: Raspberry Pi Pico connected to the LoRa V2.0 board. The RP2040 with a QFN-56 package has the following specifications:
- Dual-Core ARM Cortex-M0+ @133MHz
- 264KB of on-chip RAM
- Support for up to 16MB of off-chip Flash Memory via a dedicated QSPI bus
- DMA Controller
- Interpolator and integer divider peripherals
- 30 GPIO pins, 4 of which can be used as analog inputs
- 2 x UARTs, 2 x SPI controllers, and 2 x I2C Controllers
- 16 x PWM Channels
- 1 x USB 1.1 Controller and PHY, with host and device support
- 8 x Raspberry Pi Programmable I/O (PIO) state machines
- USB mass-storage boot mode with UF2 support for drag-and-drop-programming
which makes it ideal for projects that need the LoRaWAN technology.
![]()
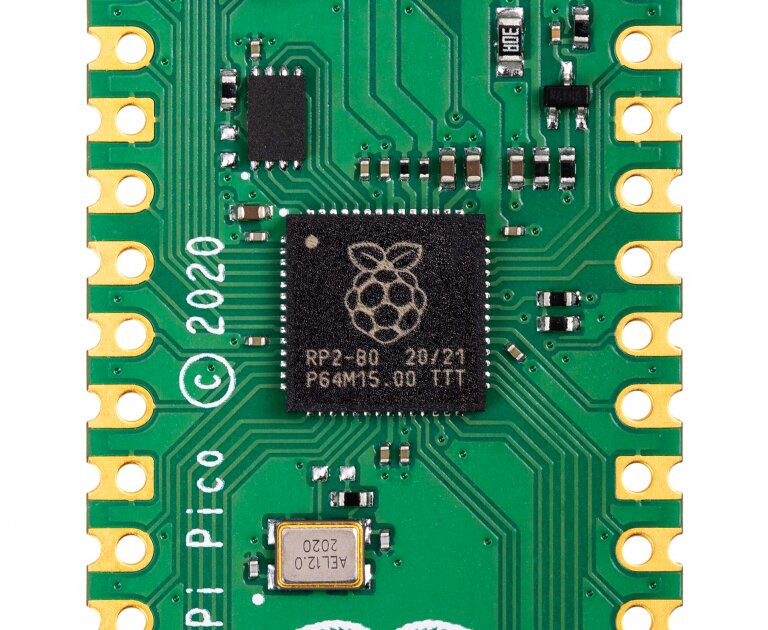
Fig. 2: Raspberry Pi Pico with RP2040.Software and Hardware
This section includes the software and hardware needed for this tutorial.
Programming the Raspberry Pi Pico using the Visual Studio Code (VSCode) IDE
The Raspberry Pi Foundation recommends the Thonny Python IDE to program the Raspberry Pi Pico, but I still prefer VSCode with the PyMakr plugin. The only difference between programming an ESP32 and the Raspberry Pi Pico running MicroPython is that you need to set the
addressparameter in thepymakr.conffile to"/dev/ttyACM0"instead of"/dev/ttyUSB0"and the file results as:{ "address": "/dev/ttyACM0", "username": "micro", "password": "python", "open_on_start": true, "safe_boot_on_upload": false, "sync_file_types":"py", "py_ignore": [ "pymakr.conf", ".vscode", ".gitignore", ".git", "project.pymakr", "env", "venv", ".python-version", ".micropy/", "micropy.json", ], "fast_upload": false }Then, you can upload, download and run files and projects as you usually do with an ESP32. For more information, take a look at this tutorial.
The Pymakr plugin with version 1.1.8 is having compatibility issues with VSCode 1.53.1/2. Therefore, you need to downgrade VSCode to 1.52.1. I hope this issue will be solved soon. If you don't want to downgrade VSCode, you can try the pico-go extension that is a derivative extension of Pymakr, which is working.
Take a look at VSCodium if you want a to have free release binaries.DIY: Add Encryption Support
To connect to LoRaWAN, you need AES encryption. The MicroPython version that supports the Raspberry Pi Pico is still very limited. So, I extended it to include the
ucryptolibpackage.I included the compiled custom firmware in the lemariva/micropython-pico-mbedtls repository. But if you want to build the firmware from scratch, follow these steps:
- First, clone the Micropython official repository, and pull the pico-sdk submodule following these steps:
git clone https://github.com/micropython/micropython.git cd micropython # # usually this shouldn't be necessary, but the master branch is not compatible with the actual pico-sdk git checkout tags/v1.14 # git submodule update --init -- lib/pico-sdk cd lib/pico-sdk git submodule update --init - To build the RP2040 MicroPython port, you’ll need to install some extra tools (toolchain, etc.):
sudo apt update sudo apt install cmake gcc-arm-none-eabi libnewlib-arm-none-eabi build-essential - and build the
mpy-crosstool:cd ../.. make -C mpy-cross - After that, add these
defines lines to thempconfigport.hfile inside theports/rp2folder:#define MICROPY_PY_UCRYPTOLIB (1) #define MICROPY_SSL_MBEDTLS (1) - This means you need to add to the pico-sdk and compile the library
MBEDTLS, which is nowadays not included. Therefore, I included that to the CMake project using this file:include(ExternalProject) ExternalProject_Add( mbedtls PREFIX ${CMAKE_BINARY_DIR}/mbedtls-2.25.0 GIT_REPOSITORY https://github.com/ARMmbed/mbedtls.git GIT_TAG v2.25.0 SOURCE_DIR ${CMAKE_BINARY_DIR}/thirdparty/mbedtls-2.25.0 BINARY_DIR ${CMAKE_BINARY_DIR}/mbedtls-2.25.0 PATCH_COMMAND cp ${PROJECT_SOURCE_DIR}/pico_config.h ${CMAKE_BINARY_DIR}/thirdparty/mbedtls-2.25.0/include/mbedtls/config.h CMAKE_ARGS -DCMAKE_CXX_COMPILER=${CMAKE_CXX_COMPILER} -DCMAKE_C_COMPILER=${CMAKE_C_COMPILER} -DCMAKE_TOOLCHAIN_FILE=${CMAKE_TOOLCHAIN_FILE} -DENABLE_TESTING:BOOL=OFF -DENABLE_PROGRAMS:BOOL=OFF BUILD_COMMAND make CFLAGS=${CFLAGS_BASE} UPDATE_COMMAND "" INSTALL_COMMAND "" ) set(MBEDTLS_HEADERS ${CMAKE_BINARY_DIR}/thirdparty/mbedtls-2.25.0/include) set(mbedtls_libraries ${CMAKE_BINARY_DIR}/mbedtls-2.25.0/library/libmbedcrypto.a ${CMAKE_BINARY_DIR}/mbedtls-2.25.0/library/libmbedtls.a ${CMAKE_BINARY_DIR}/mbedtls-2.25.0/library/libmbedx509.a ) include_directories(${MBEDTLS_HEADERS})As you may already have seen, you need a
pico_config.hfile, which is included in the repository. I duplicated some of the configurations of the ESP32. Copy that file inside theports/rp2folder. - Finally, add/modify two lines to the
CMakeLists.txtfile inside theports/rp2folder:# add this under include(micropy_rules.cmake) include(mbedtls.cmake) # add ${mbedtls_libraries} to the target_link_libraries as: target_link_libraries(${MICROPYTHON_TARGET} hardware_adc hardware_dma hardware_flash hardware_i2c hardware_pio hardware_pwm hardware_rtc hardware_spi hardware_sync pico_multicore pico_stdlib_headers pico_stdlib pico_unique_id tinyusb_device ${mbedtls_libraries} ) - Finally, build the MicroPython port for RP2040, that is, the version of MicroPython that has specific support for the Raspberry Pi Pico chip:
cd ports/rp2
make
If everything goes well, there will be a new directory called build (
ports/rp2/build), which contains the new firmware binaries. The most important ones are:firmware.uf2A UF2 binary file that can be dragged onto the RPI-RP2 drive that pops up once your Raspberry Pi Pico is in BOOTSEL mode.firmware.elfA different type of binary file, which can be loaded by a debugger (such as gdb with openocd) over RP2040’s SWD debug port.
You can drag and drop the custom MicroPython version following the instructions described here.
DIY: Raspberry Pi Pico meets LoRaWAN
Last year, I wrote a driver to connect the ESP32 to the LoRaWAN network. I explained the details in these tutorials:
- Tutorial: ESP32 running MicroPython sends data over LoRaWAN.
- M5Stack Atom Matrix: LoRaWAN node running MicroPython
Using the LoRa V2.0 board and the files from that project, you can connect the Raspberry Pi Pico to the "The Things Network".
To do that:
- Connect the LoRa V2.0 to the RP2040 as follows:
Raspberry Pi Pico LoRa V2.0 3V3 VCC GND GND GP5 NSS GP3 MOSI GP4 MISO GP2 CLK GP7 RESET GP6 DIO0 - Clone the repository:
git clone -b LoRaWAN https://github.com/lemariva/uPyLoRaWAN.git - Include this device configuration in the
config.pyfile:# RASPBERRY PI Pico device_config = { 'spi_unit': 0, 'miso':4, 'mosi':3, 'ss':5, 'sck':2, 'dio_0':6, 'reset':7, 'led':25, } - Finally, upload the project to the Raspberry Pi Pico board. If you need help with this, check out these steps.
Conclusion
This tutorial helps you extend the MicroPython official version to include support for encryption. This unlocks the board to connect to LoRaWAN using the SX1276 chip. The files to build the firmware from scratch as well as an example application are included.
We use cookies to improve our services. Read more about how we use cookies and how you can refuse them.


")

Empty