- 22
Sep - 2019Product Reviews, Single-board Computers
6 min | 21355#Rock Pi S: a tinier version of the Raspberry Pi with Alexa functionalities
Product Reviews, Single-board Computers | 6 min | 21355
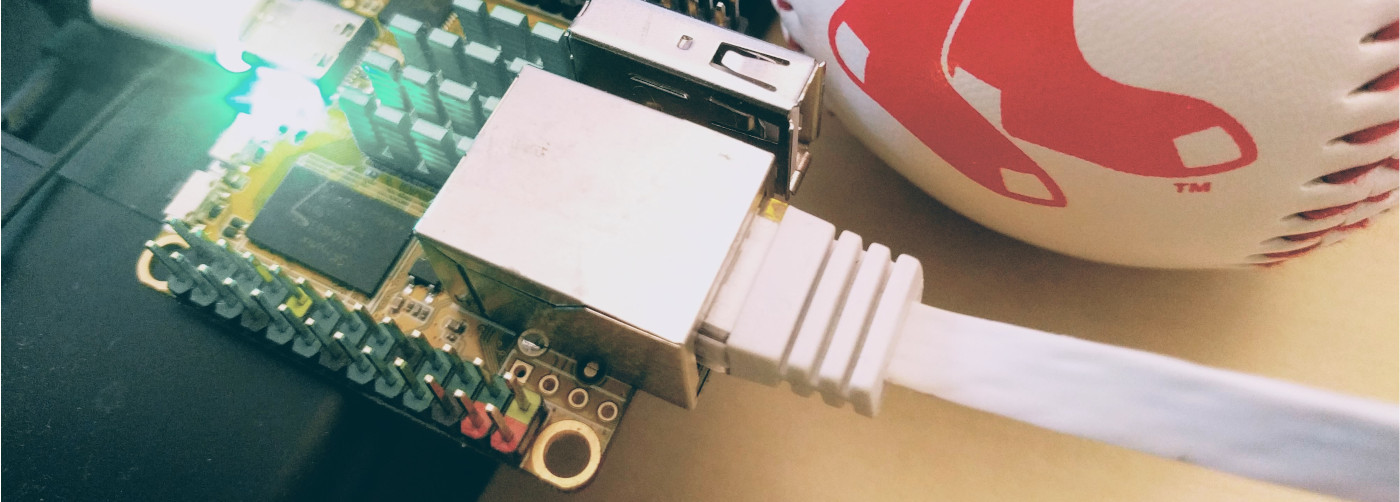
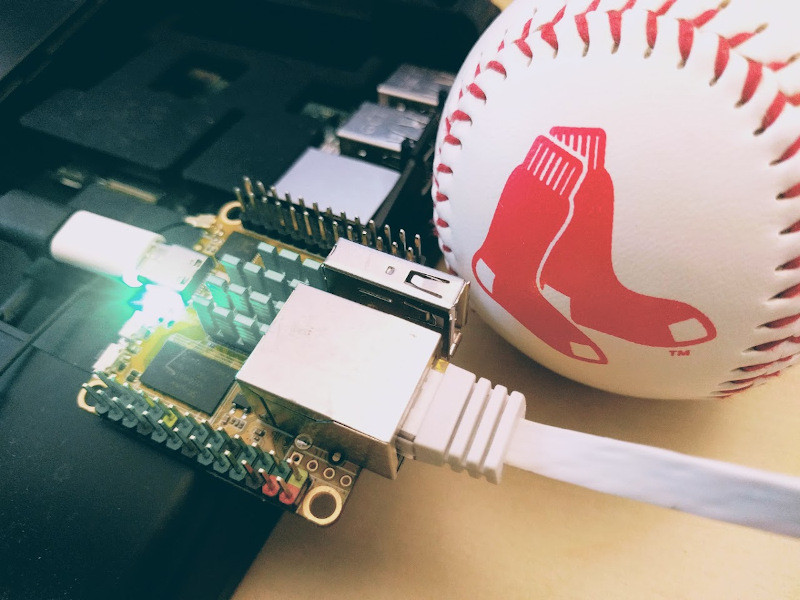
Radxy, the company behind the Rock Pi 4 is back! A couple of days ago, I've received the Rock Pi S (see Fig. 1), a miniature developer board that measures just 38 x 38 mm. The board is powered by the Rockchip RK3308 SoC, which integrates four 64-bit ARM Cortex-A35 cores (Ultra-High-Efficiency). Each of the cores reaches up to 1.3 GHz. The SoC also has a built-in voice activity detector (VAD) for use with IoT and smart voice applications.
Despite its tiny size, the Rock Pi S includes a 26-pin GPIO header along with a 26-pin audio/voice header and a microSD card reader. Additionally, the Rock Pi S has a 100 Mbps Ethernet port, a USB 2.0 Type-A port and a USB 2.0 Type-C port that supports OTG and 5V power. You can choose between two RAM options: 256 MB or 512 MB and optionally, you can get 1-8 GB of onboard NAND for storage, and an extra RTL8723BS controller that supports Wi-Fi and Bluetooth 4.0. Speaking of OS, the board runs Debian (right now only Stretch) and supports also the Buildroot.
The board costs between $9.99 and $23.99 depending on the features that you want. The cheapest version has only 256 MB RAM. However, most expensive version includes 512MB, Bluetooth 4.0, Wi-Fi, PoE and 1GB of onboard NAND storage (versions with 8 GB are still not available to sell).
Since my last posts are about evaluation of hardware for IoT, I wanted to buy one board from Allnetchina to test the performance. Unfortunately, they do not ship to Germany. Thus, I contacted Radxa and they reacted quickly (thanks again to Norbert and Tom) and sent me a board to evaluate. So let's evaluate the board!
![The Rock Pi S]()
Fig. 1: The Rock Pi S Hardware
The following table includes some of the main features of the board. One of the pin headers has colors to indicate the pin functionalities (red = +V, black = GND, etc. -see Fig. 1). I find this a nice upgrade.
Rock Pi S CPU SoC – Rockchip RK3308 quad-core Cortex A35 processor @1.3 GHz System Memory 256 to 512 MB SDRAM Storage microSD card for OS storage media optional: 128 MB/1 GB onboard NAND storage for cost saving
Connectivity 10/100M Ethernet
optional: 802.11 b/g/n WiFi 4 (RTL8723BS) with external antennaUSB 1x USB 2.0 host ports
1x micro USB OTG type-C portExpansion headers 26-pin Pi GPIO header
26-pin voice/audio headerSupported OS Debian and Buildroot Power Supply 5V via micro USB port or optional PoE (additional HAT required) Dimensions - Weight 38 x 38 mm - 26 g The hardware and software that will be used in this article are listed here:
Installing/Compiling Debian
You can find the official images here. Nowaday only Debian Stretch and Slackware ARM are available, but there are plans for Ubuntu Server and Armbian (Wip) -this should be there, but the link is still not working-.
At the moment of writing this article, the Debian image (dated 2019-08-06) does not support temperature measuring. Thus, for my test with the N-Queens-Problem benchmark, I had to compile an image from scratch, because the temperature support was added with this commit on GitHub.
You can follow the instructions from this link, but I prefer to use a Docker with the needed toolchain, libraries and packages, so I combined two tutorials together and these are the steps:
Install the prerequisites and Docker:
sudo apt-get update
sudo apt-get install binfmt-support qemu-user-static
#
curl -sSL https://get.docker.com | sh
Download the repository and switch the branch:
cd ~
git clone --recursive https://github.com/radxa/rockchip-bsp.git
cd rockchip-bsp
git checkout stable-4.4-rockpis
git fetch origin
git rebase origin/stable-4.4-rockpis
git submodule update
cd kernel
git checkout stable-4.4-rockpis
cd ../u-boots
git checkout stable-4.4-rockpis
Build the Docker image with the tools and libraries for compiling the image:
cd ~/rockchip-bsp/docker
sudo docker build -t rockchip-radxa:1 -f ./Dockerfile .
The Docker image
rockchip-radxa:1is ready. Everytime you want to build images, just run a Docker container.Run the Docker container:
docker run --privileged -it -v ~/rockchip-bsp:/root rockchip-radxa:1 /bin/bashThe line starts a container from the image
rockchip-radxa:1in an iterative mode (-it), links the folder (-v)~/rockchip-bspwith/rootand defines the entrypoint to/bin/bash. Thus, after running that line, you are inside the container and the repositories are available under/root/.
Now, after installing prerequisities and building and running the container, you can build the image with the following steps:
cd /root/
# Build u-boot
./build/mk-uboot.sh rockpis
# Build kernel
./build/mk-kernel.sh rockpis
The generated images will be copied to
out/u-bootand you will get the kernel image and dtb file underout/kernel/:root@ae530e6ef32d:~# ls out/u-boot/ idbloader.img sd-nand spi trust.img uboot.img root@ae530e6ef32d:~# ls out/kernel/ hw_intfc.conf Image overlays rockpi-s-linux.dtbAfter that, you need to build a base debian system from linaro. You can choose from a 32bit or a 64bit version:
# Use one of this option:
    # To build 32bit rootfs:
export ARCH=armhf   # I used this option to build the base image
    # To build 64bit rootfs:
export ARCH=arm64
and then, run these lines to build the image.
cd rootfs
dpkg -i ubuntu-build-service/packages/*        # ignore the broken dependencies, they will be fixed in the next step
apt-get install -f
RELEASE=stretch TARGET=desktop ARCH=${ARCH} ./mk-base-debian.sh
This bootstraps a Debian stretch image, and you get a rootfs tarball named
linaro-stretch-alip-xxxx.tar.gz.If you get the following error:
chroot: failed to run command `/usr/bin/env': Exec format error
[...]
Failed to run livebuild, please check your network connection.
it is probably becase you did not run this on your host computer:
sudo apt-get install binfmt-support qemu-user-staticThen, build the rk-debian rootfs with debug using:
VERSION=debug ARCH=$ARCH ./mk-rootfs-stretch.sh && ./mk-image.shThis installs Rockchip specified packages and hooks on the standard Debian rootfs and generates an ext4 format rootfs image at
rootfs/linaro-rootfs.img.Finally, combine everything into one image using:
build/mk-image.sh -c rk3308 -t system -r rootfs/linaro-rootfs.imgThis combines the u-boot, kernel and rootfs into one image and generates a GPT partition table. The output is
out/system.imgAfter that, you can exit the container executing the command
exit.The last step is to flash the image on a microSD card. You can use e.g. etcher to do that. Please be aware that the default user and password to connect using SSH will be:
linaro-Performance Test
The N-Queens Problem library needs python3 and the tqdm module. Thus, to install those type the following:
sudo apt-get install python3 python3-pip
pip3 install tqdm
Because the RockPi does not have a GPU temperature sensor (or any function that provides that information), I modified the get_gpu_temp(...) function in the temperature.py file as:
def get_gpu_temp(self):
    #res = os.popen('vcgencmd measure_temp').readline()
    #res = float(res.replace('temp=','').replace('\'C\n',''))
    res = float(os.popen("cat /sys/class/thermal/thermal_zone1/temp").read())/1000
    return res
to return the temperature of the thermal zone 1.
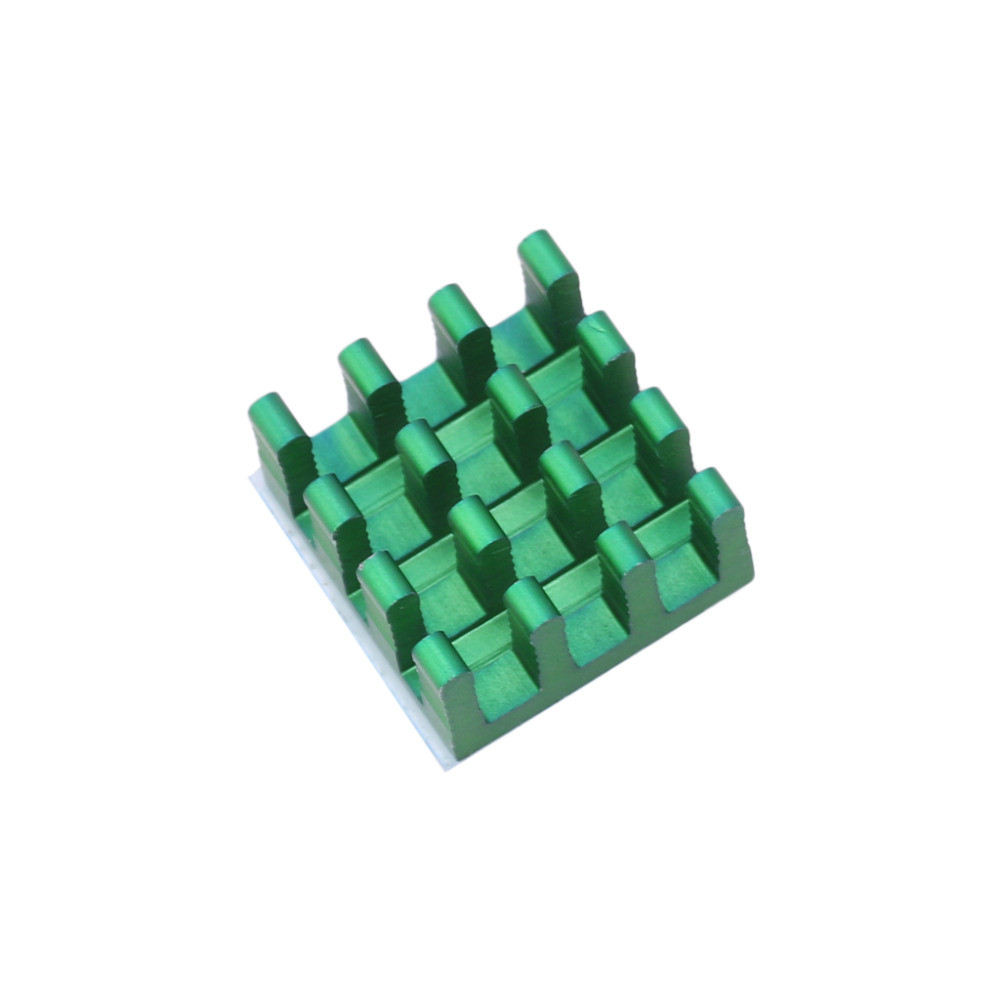
For the test, I used the same heatsink as for the Raspberry Pi:
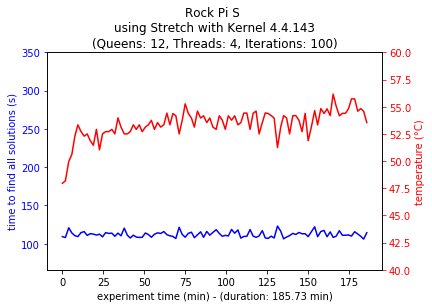
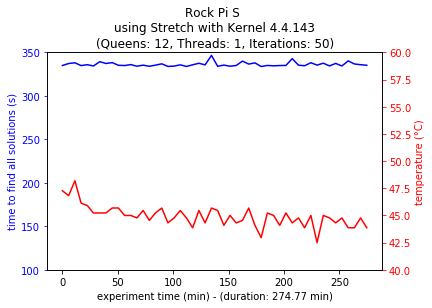
The N-queens-problem benchmark (N=12) was launched and repeated 100/50 times with multi-thread and single-thread configuration, respectively. The N-queens-problem is a well-known problem that consists of placing N chess queens on an N×N chessboard so that no two queens attack each other. In this case, there are 14200 solutions for 12 queens.
The multi-thread and single-thread performances resulted as described in Fig. 2a and 2b, respectively.
![rockpi_mt.png]()
![rockpi_st.png]()
Fig. 2a: Multi-thread Configuration Fig. 2b: Single-thread Configuration The following table sumarizes the performance of the Rock Pi S and compares it with the Orange Pi Zero LTS (Armbian) and Raspberry Pi 3B and 3B+ models (Raspbian Stretch).
RockPi S
oPi Zero LTS
rPi Model 3B+
rPi Model 3B
Avg. Multi-Thread Solving Time 112.32 s 69.97 s 62.66 s 70.85 s Multi-Thread Max. Temperature 56.16 °C 71.75 °C 68.78 °C 78.69 °C Avg. Single-Thread Solving Time 336.14 s 251.65 s 213.34 s 251.30 s Single-Thread Max. Temperature 48.19 °C 31.10 °C 54.22 °C 52.61 °C The performance is very limited, but I think it is a problem of the Kernel/OS. The maximal temperature is very low for the chip, thus I estimate that the performance is somehow limited by software. I'll keep you updated when the new images are released. The single-thread test was in average 3.00x slower than the multi-thread test (274.77 min vs 91.85 min to solve 50 N-queens-problems).
Conclusions
The market has become more difficult for competitors with the release of the Raspberry Pi 4. But, it is still worth thinking about alternatives to Raspberry in the low-cost segment. The Rock Pi S positions itself here against the much lower-power, single-core variants of the Raspberry Pi Zero. In comparsion with the Orange-Pi Zero LTS, the performance is still very limited. But as I said, it has to be a problem with the OS/Kernel. The board is very small and the pin header with colors is a great idea. The community has to grow up and the documentation is still in its beginning phase, which makes it difficult to experiment with the board. However, the audio/voice capabilities of the RK3308 can make a big difference in decision making to buy such a board. Thus, I will try in the next days to use the 26-pin audio/voice header, and see how it works. Stay tuned!
We use cookies to improve our services. Read more about how we use cookies and how you can refuse them.


Empty