") 04
04
Dec - 2019Home Automation, Raspberry Pi
6 min | 46494#Raspberry Pi: Controlling Philips HUE Lights (ZigBee & CC2531)
Home Automation, Raspberry Pi | 6 min | 46494
Table of contentShowThis article extends the tutorial about Hass.io and the Xiaomi Aqara Sensors that I've published months ago. That tutorial is part of the series of articles about Zigbee and the Rasbperry Pi using the CC2531 USB dongle. Here are the links:
- Zigbee: Xiaomi Sensors using Raspberry Pi (without Gateway!)
- Zigbee: Flashing a CC2531 dongle using a Raspberry Pi
- Raspberry Pi: Xiaomi Sensors & Home Assistant (Hass.io)
- Zigbee: Reading Xiaomi Sensors with a Raspberry Pi (no Xiaomi gateway needed!)
![lights_cc2351-min.png]()
Fig. 1: Hass.io: Philips HUE Lightstrip. In Zigbee: Xiaomi Sensors using Raspberry Pi (...), I didn't mention that same "hacking" can be used to control Philips HUE lights. This means, you don't need to buy the Philips Hue Bridge (€45) to control the HUE lights and you can replace it with a Raspberry Pi, a CC2531 USB dongle and Hass.io.
This article summarizes the above mentioned tutorials. Thus, if you need detailed information about the steps, please refer to those links.
This article is outdated! A new version has been published: Hardware and Software
The following hardware and software will be used in this tutorial:
DIY
The DIY tutorial is divided in two main parts. The first part is related with the configuration of the needed hardware, and the second part describes the software needed on Raspbian.
Hardware
To get started, you need to flash a new firmware to the ZigBee CC2351 USB dongle. To do that, you can choose between two options:
- Buy a SmartRF04EB to program the CC2351 USB dongle:
- Use the Raspberry Pi to program the CC2351 USB dongle:
The first option is the easiest, but you need to spend some more money (about +$10). The second option requires some electronic skills (soldering and cabling). Both options work on the hardware listed above.
Docker and Hass.io
You need to install Docker to start with this part of the tutorial. Therefore, log in to your Raspberry PI (remotely or locally) and type the following into a terminal:
curl -sSL https://get.docker.com | sh
sudo usermod -aG docker pi
The following terminal lines deploy a dockerized running version of Home Assistant. Actually, it creates a service that deploys the hassio-supervisor container, which then pulls and runs the
raspberrypi3-homeassistantcontainer. This means that you can still use Raspbian on the Raspberry Pi and install add-ons using the Hass.io add-ons section.FYI: You can install Home Assistant using the official docker tutorial or using Python virtual environment and typingpython3 -m pip install homeassistant. But, then you cannot directly install any add-ons using the web interface (the option Hass.io is not available). You can download the image and flash Hass.io on a micro SD card, but then you get HassOS as a custom OS and not Raspbian.sudo apt-get update sudo apt-get install -y apparmor-utils apt-transport-https avahi-daemon ca-certificates curl dbus jq network-manager socat software-properties-common wget "https://raw.githubusercontent.com/home-assistant/hassio-installer/master/hassio_install.sh" chmod +x hassio_install.sh sudo ./hassio_install.sh -m raspberrypi4If you are using using another SoC like e.g. Orange Pi, check the home assistant registry images and replace the argument
raspberrypi4(in my case Raspberry Pi 4B+) with the corresponding, e.g.:orangepi-primefor the Orange-Pi Prime.Some notes and tips after installing Home Assistant:
Note 1: If you want to stop everything, you need to type the following:
This stops thesudo systemctl stop hassio-supervisor.servicearmhf-hassio-supervisorcontainer and then you can stop all the other running containers. Otherwise, the containers will start automatically after you stop them.
To start the service again, type the following:
Note 2: If you need to update the Hass.io version, type the following on a terminal/console:sudo systemctl start hassio-supervisor.servicesudo docker pull homeassistant/raspberrypi3-homeassistant:latest sudo systemctl stop hassio-supervisor.service sudo systemctl start hassio-supervisor.service sudo rebootInstalling Zigbee2mqtt
After installing Hass.io, you can access Home Assistant pointing to
http://<ip-address>:8123. Home Assistant will ask you to set up a username and password.Then, follow these steps to pair the Philips HUE lights:
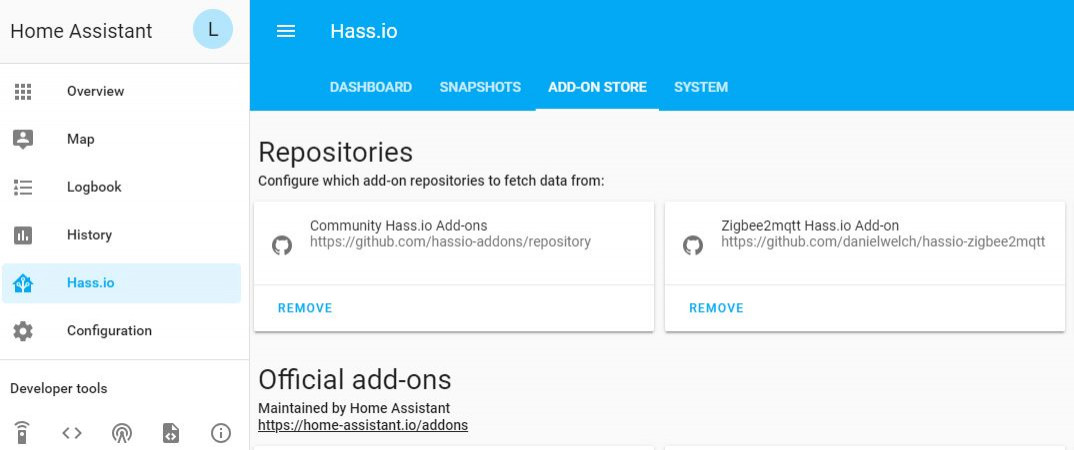
- Go to
Hass.io(on the left menu) and add thehttps://github.com/danielwelch/hassio-zigbee2mqttas repository (see Fig. 2). - Look for the
Mosquitto brokeradd-on and install it. - Set the configuration to the following (I added login credentials to the MQTT broker. Alternative, you can set
anonymoustotrue) and start the add-on:{ "logins": [ { "username":"yourusername", "password":"yourpassword" } ], "anonymous": false, "customize": { "active": false, "folder": "mosquitto" }, "certfile": "fullchain.pem", "keyfile": "privkey.pem", "require_certificate": false } - Then, look for the
zigbee2mqttadd-on and install it. - Set the configuration (add the login credentials - more options are available here) to the following and start the add-on (the default options have an error, the password key should be
passwordand notpass!):{ "data_path": "/share/zigbee2mqtt", "devices": "devices.yaml", "groups": "groups.yaml", "homeassistant": true, "permit_join": false, "mqtt": { "base_topic": "zigbee2mqtt", "server": "mqtt://<ip-address>:1883", "user": "yourusername", "password": "yourpassword" }, [...]You need to have the USB-ZigBee dongle connected before you start the add-on. The
permit_joinoption should be set totrueto pair the ZigBee lights. Once you joined all devices, setpermit_jointofalsefor security reasons. Every time you change a setting, you need to restart the add-on. - Go to
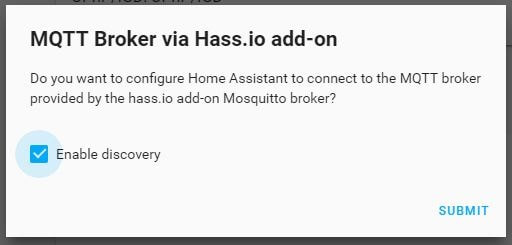
Configuration->Integrations, and configure the MQTT add-on selecting theEnable discoveryoption (see Fig. 3). - Connect the Philips HUE light to the power outlet and wait.
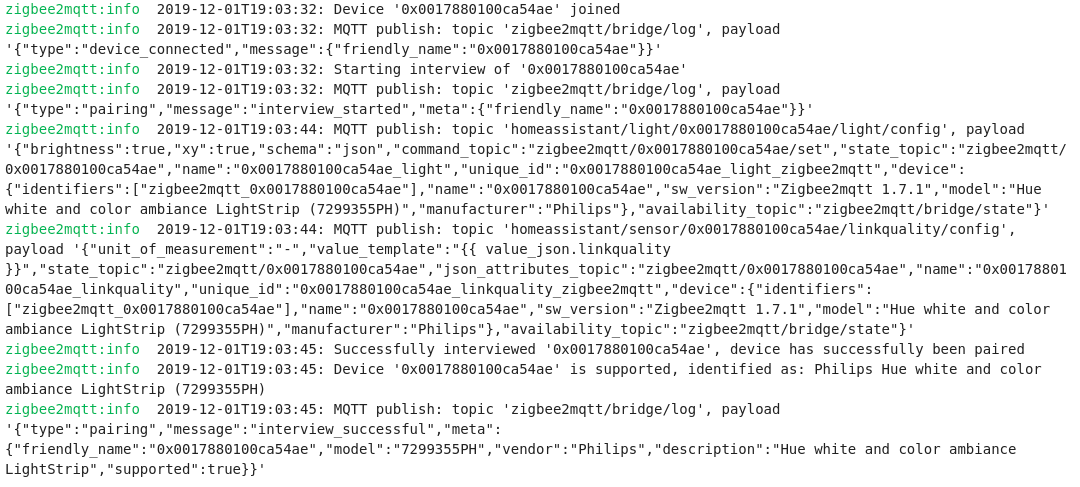
- Go to
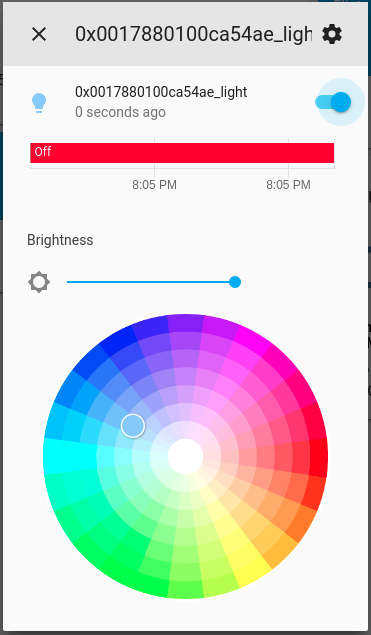
Hass.ioclick on thezigbee2mqttextension and scroll down to the Log. You should see something like Fig 4. - The light should be available on the
Overviewpage as in Fig. 5. The result of that configuration is shown in Fig. 1. - Once you joined all lights and devices (you can also add [Aqara sensors]https://lemariva.com/blog/2019/07/zigbee-xiaomi-sensors-and-raspberry-pi)), do not forget to set the
permit_joinvariable tofalse! and restart the add-on.
When you paired your strip, you should then backup thedatabase.dbfile. Do this, especially if you don't have any Philips HUB bridge like myself.
Some Philips LEDs strips have to be reseted in order to connect to another hub and this can be only done by software using a Philips HUE bridge (some new ones have a button). Thus, if you format your Raspberry Pi, and you want to re-pair your LEDs, it could be a little bit tricky. But, if you backup thedatabase.db, you can add it again without any problem.
You need to list the running containers typingdocker container lsand run bash inside the zigbee2mqtt-armhf (docker exec -it CONTAINER-ID /bin/bash). Inside the container you cancatthe file/share/zigbee2mqtt/database.dband copy the database contents. Check the following:
Then, you can replace the file on a new system with that content, or you can add only the Philips HUE bridge as an end device on the list using theroot@orangepizero:~# docker container ls CONTAINER ID IMAGE [...] 21462b915728 dwelch2101/zigbee2mqtt-armhf:1.8.0 [...] root@orangepizero:~# docker exec -it 21462b915728 /bin/bash bash-5.0# cat /share/zigbee2mqtt/database.db {"id":1,"type":"Coordinator","ieeeAddr": [...] {"id":5,"type":"Router",[...] "manufacturerName":"Philips","powerSource" [...]} }vicommand.
The Xiaomi/Aqara sensors do not have this problem, and can be always paired to a new system.![hass_io-min.JPG]()
Fig. 2: Hass.io running on Raspbian. ![mqtt_configuration-min.JPG]()
Fig. 3: MQTT configuration: Enable discovery mode option. ![Screenshot from 2019-12-01 20-04-52.png]()
Fig. 4: zigbee2mqtt log: Philips HUE Lightstrip found and added. ![Screenshot from 2019-12-01 20-06-00.png]()
Fig. 5: Hass.io: Philips HUE Lightstrip control panel. Conclusion
This article extends the tutorials about the Zigbee Gateways replacements using a Raspberry Pi. In this case, the Philips HUE Bridge is replaced with a Raspberry Pi and a CC2531 USB dongle. Hass.io and the Zigbee2mqtt add-ons enable the Raspberry Pi to connect to the HUE lights and control them. HUE lights can be combined with Aqara sensors and using Hass.io rules, it is possible to switch them on using the signal of a PIR sensor, or change their colors according to the ambient temperature.
We use cookies to improve our services. Read more about how we use cookies and how you can refuse them.
")

")
")


Empty