 23
23
Jan - 2020MicroPython
3 min | 12720Table of contentShowThis tutorial helps you update a BRIO locomotive using an ESP32 that runs MicroPython. As a result, you can control the speed of the BRIO using a cell phone or a laptop (basically, everything that has a browser).
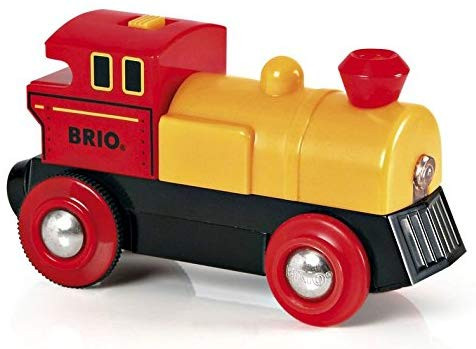
If you don't know what a BRIO locomotive is, check out the following picture:
![BRIO World 33594]()
Fig. 1: BRIO World 33594 In this tutorial, I will try to accomplish the following points:
- Hardware modifications on a ESP32 board;
- MicroPython installation;
- Controlling the locomotive speed using a web browser.
The results can be seen in the following video (turn on the sound!):
Software and Hardware
The following hardware and software will be used in this tutorial:
Hardware Modifications
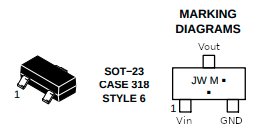
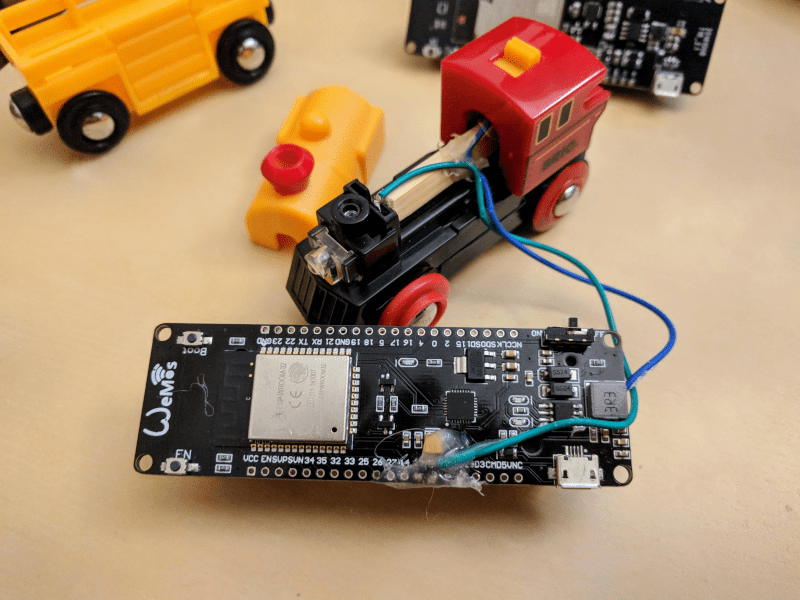
This setup is only to control the speed of the BRIO (start and stop too). If you need to control direction (forward or backward), you need to use an H-bridge configuration.Unfortunately, inside the BRIO there isn't enough space to mount an ESP32 and a 3.7V battery. Thus, the ESP32 board with the battery are outside and will be transported on a second wagon (BRIO World 33406). The BRIO locomotive needs a 1.5v AAA battery and, as you see in the hardware list, the ICR18650 is listed. That is a 3.7v Li-ion battery. The battery will power the ESP32 board and throughout a PWM signal the motor and light of the BRIO locomotive. The ESP32 pin maximal current is not enough to supply the motor and the light so you'll need an NPN MOSFET (Fig. 2).
![mosfet.png]()
Fig. 2: MOSFET pin description You need to connect
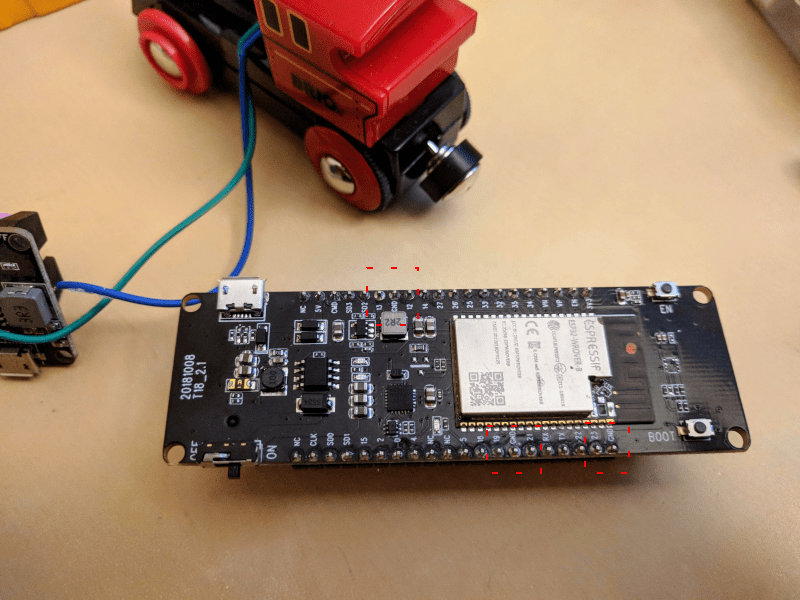
pin 1of the MOSFET (Vin) to apinof the ESP32 andpin 2(GND) to the ground of the board. In Fig. 2a, you can see that I am using a WeMos board. But that board is no longer available. Moreover, it only has 512kB RAM, which is very limited. That's why I listed the board shown in Fig. 2b. You can solder the SOT-23 NPN MOSFET between (check the red dashed boxes on Fig. 2b):pin 12andGND(pointing to the board inside)pin 19&GND(pointing to the board inside)pin 23&GND(pointing to the board inside)pin 13&GND(pointing to the board outside)GND&pin 21(pointing to the board outside)
pin 3of the MOSFET (Vout) is connected to positive+battery terminal of the BRIO (green), and a second cable (blue) connects the negative-battery terminal of the BRIO to the ESP32+battery terminal (check Fig. 2a). You can switch the polarity on the BRIO, the motor and the light will work anyway. You can use a hot glue gun to fix the MOSFET to the board as you see in Fig. 1a.![]()
Fig. 2a: BRIO and ESP32 connection![]()
Fig. 2b: ESP32 8MB RAMMicroPython Installation
Download a MicroPython firmware image. If you bought the ESP32 board with 8MB RAM that I listed before, you should download the firmware with SPIRAM support. Otherwise, you won't see the extra MBs of RAM.
Then, connect the board to a USB port on your host PC and flash the ESP using the esptool.
esptool.py --chip esp32 --port /dev/ttyUSB0 erase_flash
esptool.py --chip esp32 --port /dev/ttyUSB0 --baud 460800 write_flash -z 0x1000 esp32-idf3-20191220-v1.12.bin
You can check this tutorial for more information: Tutorial: Getting started with MicroPython. If you are a MicroPython newby, I recommend you to read this article too: MicroPython: Visual Studio Code as IDE.
BRIO Locomotive Speed Contol
Clone the following repository:
git clone https://github.com/lemariva/uPyTrain.gitand rename the
boot.py.sampletoboot.pyand add your Wi-Fi credentials:ssid_ = '' wpa2_pass = ''This enables the BRIO locomotive to connect to Wi-Fi. Upload the code to the ESP32 using VSCode and the PyMakr extension (if you don't understand this, check this tutorial.)
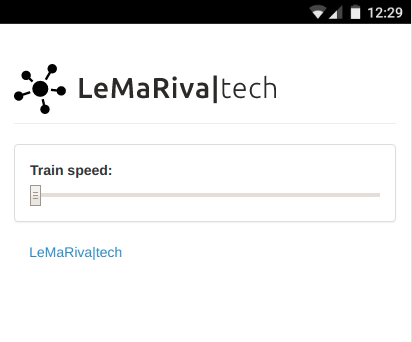
The ESP32 should connect to the Wi-Fi. Then, open a browser and visit the IP address listed on the VSCode Terminal: You should get Fig. 3 and the speed control is shown in the article video listed above.
![train_web.png]()
Fig. 3: Website to control the BRIO locomotive speed Conclusion
This tutorial helps you upgrade a BRIO locomotive to connect it to Wi-Fi and control its speed. The ESP32 running MicroPython offers a small website and, through a GET request, you can set the PWM duty cycle, resulting in the speed of the locomotive. Have FUN!
We use cookies to improve our services. Read more about how we use cookies and how you can refuse them.


")


Empty